Sunday, December 31, 2006

Happy New Year

This has been a great year here at 28 Cooks. I started this blog back on January 4th of 2005, and I had no idea I would enjoy it as much as I do. For those who have been with me from the very beginning when my pictures looked like this, and those who have joined me over the past year, I thank you for the comments, the emails, the support, and the willingness to keep coming back as I still continue to learn.

I hope this year has been as wonderful for you as it's been for me, and I hope that the next year is even better for us all.

Lancaster Walk

From the 28 Cooks Kitchen, I wish you a very Happy New Year!

Friday, December 29, 2006

Cardamom Coconut Macaroons & Coquito

Although the big holiday event has come and gone already, there is still one more in the near future. New Year's Eve is another reason to get together with your friends, sharing memories and good food. Unlike the night before Thanksgiving, which is the biggest day to go out and party, New Year's Eve is the biggest day to party at someone's house. And although I don't have plans as of yet, I'm sure New Year's Eve will find me surrounded by good friends and fun.

Cardamom Coconut Macaroons


If you're looking for a quick and easy dessert idea for another upcoming event, this is a winner. The macaroons are amazingly quick to make (my batch took about 20 minutes, from start to cooling time) and the cardamom adds a lovely exotic flavor. This recipe is courtesy of one of my new favorite cookbooks, In Nirmala's Kitchen.

Coquito


The coquito is a recipe courtesy of a coworker of mine. Coquito is a traditional Puerto Rican holiday beverage and is a tasty variation of eggnog. Although I'm not wild about the traditional eggnog, this one is definitely delicious and bang-dead easy to make.


Cardamom Coconut Macaroons
Makes about 16 large cookies
2 1/2 c unsweetened grated coconut
1/4 c sweetened condensed milk
2 tsp ground cardamom
2 large pinches salt
2 large egg whites

In a large bowl, combine coconut, milk, cardamom, and one pinch of salt. Stir well with a wooden spoon until evenly combined. Set aside. In a small bowl, combine egg whites and pinch of salt; beat with mixer until stiff peaks form. Fold into coconut mixture until just combined.
Drop 1 tbsp of batter onto parchment-lined baking sheet, leaving about 1 inch between cookies. With wet hands, mold into mounds. Bake in oven for 8-10 minutes, until edges are starting to brown. Cool on sheet for 5 minutes, then remove and cool on wire racks. If desired, cookies are wonderful drizzled with melted dark chocolate.

Coquito
1 (15 oz) can cream of coconut
1 (15 oz) can coconut milk
1 (15 oz) can sweetened condensed milk
1 (15 oz) can coconut water
1 tbsp vanilla
1 tsp cinnamon
1/4 tsp nutmeg
2 egg yolks (optional)
8 oz rum, either white or coconut (optional)

Empty all 4 cans into blender. Process until well mixed. Add vanilla, cinnamon, nutmeg, and egg yolks, if using. Blend well. Add rum, stir well, and allow to sit in the refrigerator overnight. If mixture is too thick, add milk or more coconut milk to thin.

Thursday, December 28, 2006

Chili Garlic Edamame

I've had edamame a few times in the past, but I didn't fall in love with it until I had it at Nectar (which is an exceptional restaurant, and is amazingly close to the restaurant I've always dreamed of opening). They do a simple quick stir in a wok and serve it with some delicious sauces. After tasting it there, I immediately came home and tried to recreate it. I've gotten pretty close, and I often like to whip it up* for a quick and fairly healthy snack.

But this morning, as I was flipping through this month's current issue of Gourmet, I saw a recipe for edamame that I just knew I needed to try. The following is my variation, and includes one of my new favorite things, chili garlic sauce. This is a relatively simple recipe to whip up, and would make a fabulous appetizer.


As an aside, please bear with me as I learn the techniques and settings on the new camera.


Chili Garlic Edamame

Chili Garlic Edamame
1 lb frozen edamame, in pods
2 tbsp soy sauce
2 tsp oyster sauce
1 tsp sesame oil
1 1/2 tsp chili garlic sauce
2 tsp vegetable oil
1 tsp minced ginger

Steam edamame in microwave until slightly warm and not frozen. (You can do this one of 2 ways - I have a microwave steamer that I use, or even easier is throwing the edamame in a ziploc bag with about a tbsp of water, sealing it, leaving a small opening for steam, and heating it on high for 2 minutes) Drain and set aside. In a small bowl, combine soy sauce, oyster sauce, sesame oil, and chili garlic sauce. Heat a large wok over high heat. Add oil, and saute ginger for 15 seconds. Add edamame and stirfry for 1 minute. Add sauce, and stirring frequently, cook for an additional 1-2 inutes, or until most of the liquid has evaporated. Remove from heat, place in serving dish, and enjoy!

*This is the easiest way to make tasty edamame - steam in microwave as above. Heat 1 tsp of sesame oil in wok over high heat. Add edamame, season with Adobo or any other salt seasoning blend, and stirfry for 1-2 minutes, until heated through.

Wednesday, December 27, 2006

Blessed Christmas

This has been a good year for 28 Cooks, and this past Christmas was no exception. Not only did Santa bring some lovely gifts, including a dream camera, a gorgeous French press, and some lovely Le Creuset cookware, but I got to do one of the things I enjoy the most - spend time with my family. The days were spent eating, monkeying around, and laughing far too much.

And to all of you who donated money towards the Menu of Hope, a sincere thanks! A total of $58,256.70 was raised for the UN World Food Programme. How amazing!

I'll be back tomorrow with some new recipes and hopefully some upgraded photography with my new baby.

Wednesday, December 20, 2006

Menu for Hope III

menuforhopelogo


I don't think there's a food blogger out there who doesn't have a deep and personal relationship with food. It's the very essence of what we do, and we love it enough to devote our time to learning more about it. But we're the lucky ones - we can go to the grocery store and load up our carts with whatever we want.

Every year, Food Bloggers from all over the world get together for a fundraising campaign. We call it 'Menu for Hope'. Last year, they raised $17,000 to help UNICEF.This year, Menu for Hope III is raising funds to support the UN World Food Programme, which provides hunger relief for needy people worldwide. So far this year, they've raised over $34,000.

This "Menu for Hope" is our small way to help.On the menu this year is a great list of amazing food related prizes. We hope that they will entice you to give whatever you can, and with some luck you can win unique and wonderful food gifts offered up by food bloggers from around the world.The rule is pretty easy. For every US$10 you donate, you may claim one raffle ticket toward a prize of your choice. The more you give, the better your chance to win. The campaign is scheduled to run from now until Friday 22nd, 6PM PST. So get a move on!

There are some seriously excellent prizes this year - vouchers for $350-$400 at some excellent restaurants, bottles of wine, and all sorts of cookbooks, tools, and food from all over the world. It's definitely worth checking it out, and definitely worth spending a few dollars towards a good cause.

Wednesday, December 13, 2006

Carrot & Cilantro Raita

The other night, I was watching one of those cooking shows and the topic was Indian food. There's not much I love more than Indian food, so my interest was definitely piqued. One of the dishes made included a raita on the side, and I knew I wanted to give it a try. Raita is a typical South Asian sauce that is excellent with spicy foods. The cooling effect of the yogurt is the perfect complement to the spicy factor of most Indian foods.

This is a great little quick-and-easy dip. I made this in about 10 minutes, and it's got a lovely complex flavor, despite the recipe's easy and short ingredient list. Serve with samosas, curries, or spread on pita.

Carrot & Cilantro Raita

Carrot & Cilantro Raita
1/4 carrot, finely shredded
1 clove garlic, minced
1/2 tsp paprika
1/4 c water
1/2 c yogurt
1/2 tsp fresh lemon juice
1 tbsp cilantro, finely minced

Place carrot, garlic, paprika, and water in a small saucepan. Bring to a boil, and simmer until all water is evaporated. Cool slightly. Place in small bowl. Add remaining ingredients and stir well.

Monday, December 11, 2006

Fleur de Sel Caramels

As I was saying the other day, there are so many excellent food blogs that provide boundless inspiration for me. As I was doing my daily trip around my bloglines, I happened across this post at Everybody Likes Sandwiches. I became instantly obsessed with them, and knew they needed to be made immediately.

As luck would have it, I had just received a jar of Fleur De Sel as part of a gourmet salt sampler for my birthday, which was last week. I've been looking for recipes to use them in, so this was definitely a timely post.

I've never made caramels before, and I must admit it was much easier than I thought. The flavor is amazing, and the salt is the perfect complement to the creamy caramel. These are perfect for gift-giving, or for keeping around the house when you need to satiate a sweet tooth.

Fleur de Sel Caramels

Fleur de Sel Caramels
1 c heavy cream
5 tbsp unsalted butter, cut into pieces
1 1/4 tsp fleur de sel
1 1/2 c sugar
1/4 c light corn syrup
1/4 c water

Also needed - parchment paper, 8x8 pan, candy thermometer, glass of water with ice

Line bottom and sides of the 8x8 baking pan with parchment paper, then lightly oil parchment. (I used tape to secure the paper down). Bring cream, butter, and fleur de sel to a boil in a small saucepan, then remove from heat and set aside. Boil sugar, corn syrup, and water in a 4 qt saucepan, stirring until sugar is dissolved. Boil, without stirring but gently swirling pan, until mixture is a light golden caramel (This took about 5 minutes for me, and my thermometer read about 300 degrees). Carefully stir in cream mixture, which will bubble up rapidly, and simmer, stirring frequently, keeping temperature around 248 degrees. Continue to cook until a drop of caramel firms up to desired texture in the glass of ice water (I like a softer, chewier caramel, and this took about 5 minutes for me). Pour into baking pan and allow to cool for 2 hours. Cut into pieces, and wrap in wax paper.

Friday, December 08, 2006

Chai Pumpkin Bread

There's nothing more comforting than richly-spiced bread, warm from the oven, and spread with melting butter. This is a perfect wintertime bread, and if you love chai tea, you'll love this.

Perfect for those afternoon cups of coffee or tea, or great to make in mini loaves and give as gifts.

Chai Spiced Pumpkin Bread

Chai Pumpkin Bread
1/2 c sugar
1/2 c butter, at room temperature
1 c canned pumpkin
2 large eggs
2 chai tea bags, steeped in 1/2 c boiling water
1 tsp vanilla
1 1/3 c all-purpose flour
2/3 c whole-wheet flour
2 tsp baking powder
1/2 tsp baking soda
1 1/2 tsp salt
2 tsp cinnamon
1/2 tsp each cardamom, ginger, and black pepper
1/4 tsp each cloves, nutmeg, and allspice

Preheat oven to 350. In a large bowl, use a mixer to beat together sugar and butter until light and fluffy. Add pumpkin, eggs, chai tea liquid, and vanilla and stir until well combined. Add flour, baking powder, baking soda, salt, and spices and stir just until evenly moistened. Pour into prepared 8" loaf pan. Bake 45-55 minutes, or until a toothpick inserted comes out clean. Cool at least 20 minutes before serving.

Thursday, December 07, 2006

Soto Ayam with Baby Bella & Tofu Wontons

I love the food blogging community. Not only are there plenty of excellent food bloggers, but there are incredible readers who provide much inspiration. From time to time, someone will send me a recipe, asking me to give it a try or make it vegetarian. Since I always love a challenge, I truly enjoy these requests.

A few weeks ago, someone sent me a link to this recipe for Soto Ayam. Soto Ayam is a traditional Indonesian soup that usually includes chicken and peanuts. My original thought was to just use the broth, and include some fresh veggies. But as I was standing in the grocery store, I saw some lovely baby portabella mushrooms and knew in which direction I needed to head.

The tofu and mushrooms, touched with fresh lemon zest and ginger, are a winning combination, and when added to this exotically-flavored broth, make a perfect dish. This is a recipe that any fan of East Asian cuisine will enjoy and appreciate.

Soto Ayam with Baby Bella Tofu Wontons

Soto Ayam with Baby Bella & Tofu Wontons
Wontons
1 (14oz) pkg extra-firm tofu
2 cloves garlic
1 tbsp fresh ginger, minced
2 scallions, white parts only, diced
2 c diced baby portabella mushrooms
zest of 1 lemon
2 tsp soy sauce
1/2 tsp sesame oil
1 tsp chili garlic sauce (optional)
1 tsp cornstarch
1/4 tsp salt
2 pkgs wonton skins

Soto Ayam
4 cups vegetable stock
2 tsp soy sauce
1 1/2 tbsp light molasses
2 tbsp fresh lemon juice
2 cloves garlic, minced
3 tbsp extra-crunchy peanut butter

Prepare wontons first. Remove tofu from package and drain. Wrap tofu in paper towels; place on a plate, cover with cutting board with canned goods on top. Let drain about 30 minutes. Place into food processor with ginger, garlic, and scallions. Process until well combined. Place into large bowl with remaining wonton ingredients. Fold into wontons, following directions on back of wonton skin package. Recipe makes 48 wontons. Reserve 12-18 for soup. The rest can be frozen by placing onto a baking sheet and placed into the freezer until frozen, then stored in plastic bags until needed.
In a large saucepan, add stock, soy sauce, molasses, lemon juice, and garlic. Bring to a boil, lower heat, and allow to simmer for 10 minutes. Whisk in peanut butter, bring to a boil, and boil for 3 minutes. Drop in wontons, and boil for 5-8 minutes, until tender. Serve and enjoy!

Wednesday, December 06, 2006

Dark Chocolate Peanut Butter Brownies

I've spent a substantial part of my life living and traveling in other countries. The most recent was a stint I did 2 years ago, teaching English in a small community in Guatemala. I loved living there and fell in love with the food, but there were always a few things I missed from the States.

No matter what country I was in, it seemed that one of the top 3 things that expatriots miss is good old peanut butter. Although there are substitutes, there's just nothing comparable to our brands like Jif and Skippy. Those two were always top requests to be brought by anyone coming to visit from the States.

One of the teachers in the school I was at was from Washington State, and had a nice little stash of Jif Peanut Butter. She would use it, as well as some excellent local dark chocolate, to make these brownies for any special occasion. Although they are by no means low-fat or diet-conscious, they are completely delicious and take me right back to a country I hold very dear in my heart.

Dk Chocolate Peanut Butter Brownies

Dark Chocolate Peanut Butter Brownies
1/2 c peanut butter
1/3 c butter
1 c sugar
1/4 c brown sugar
2 eggs (or egg substitute)
1 c flour
1 tsp baking powder
1/4 tsp salt
1 c dark (or milk) chocolate chips
1/2 tsp vanilla
Topping
1/2 c chocolate chips
1/3 c peanut butter

Preheat oven to 350 degrees. Beat peanut butter and butter until well combined. Gradually add sugars, and beat until fluffy. Add eggs, or egg substitute, gradually. Mix in flour, baking powder, and salt. By hand, stir in vanilla and chocolate chips. Spread into a buttered 8x8 pan, and place into oven. Bake 30 minutes, or until toothpick inserted in the center comes out clean. Remove from oven and cool completely on a wire cooling rack.
For topping, combine peanut butter and chocolate chips in a small bowl, and melt in the microwave, stirring occasionally. Spread over cooled cake.

Monday, December 04, 2006

Green Peppercorn Asiago Biscuits

I think one of my favorite things about the holidays is all of the chances you have to entertain and be social. As I've said before, it's important to have recipes that you can make at a moment's notice for any surprise guests or events.

Although I'm a huge dip and spread fan, you also need things to put them on. I love to make my own crackers and flatbreads, and these are a delicious addition to my entertaining recipes.

Green peppercorns, especially those in brine, have such an incredible flavor, and I try to use them as often as possible. Combined with the asiago cheese, they add a lovely flavor to these light little biscuits that are perfect for serving with dips, or by themselves.

Green Peppercorn Asiago Biscuits II

Green Peppercorn Asiago Biscuits
1/2 lb butter, softened
2 tsp worcestershire sauce
a dash or two of hot sauce
2 c shredded Asiago cheese
1 1/2 c flour
1/2 tsp salt
1 tsp paprika
3/4 tsp green peppercorns, minced

Preheat oven to 375. In a small bowl, cream butter, worcestershire, hot sauce, and cheese until smooth. In a larger bowl, combine flour, salt, and paprika with a fork. Gradually add to cheese mixture. Add in peppercorns, and mix until dough holds together. (May need a tsp of water to help it hold together). Shape into a log, wrap in plastic wrap, and chill in the refrigerator for 10 minutes. Remove, slice, and place rounds on ungreased cookie sheet. Bake in oven for 10-15 minutes, or until lightly browned. Cool on a wire rack.

Friday, December 01, 2006

Cannellini Bean Hummus with Artichokes and Feta

So you know I've got a thing for hummus. And although I've made quite a few variations, I've never branched out into the cannellini-bean-hummus arena.

I've had a can of cannellini beans in my pantry for a bit, as well as a nice can of artichoke hearts, so I thought I'd try something with them. I must admit, I was rather surprised at how tasty the result was. Although cannellini beans and canned artichokes can be a bit dull, the lemon juice and feta cheese help to liven it up. This is another great recipe for entertaining that won't make you feel like you need to loosen your belt.

White Bean Artichoke Feta Spread

Cannellini Bean Hummus with Artichokes and Feta
1 (15 oz) can cannellini beans, drained and rinsed
1 (14 oz) can artichoke hearts, drained and rinsed
2 tbsp lemon juice
2 cloves garlic, minced
1/4 tsp salt
1/4 tsp pepper
1 tsp italian seasoning
4 oz feta cheese, crumbled

Combine beans, artichokes, lemon juice, garlic, salt, pepper, and italian seasoning in a food processor. Process until well combined. In medium bowl, place crumbled feta cheese. (I used a potato masher to crumble it a bit more and get rid of the larger chunks) Add pureed mixture, and stir until well combined. Allow to chill in the refrigerator for a few hours until flavors develop. Serve with crackers, tortilla chips, or fresh veggies.

Wednesday, November 29, 2006

Tofu-you-didn't Lasagna

So let me tell you something - as much as I want to be a good vegetarian and embrace tofu, I just can't. There's something about the texture of tofu that I just can't handle. So unless it's heavily disguised in something else, I probably won't touch it. It's sort of sad, too, since it's so good for you, and very high in protein.

This is one way that I could eat it all the time without even hesitating. I promise you that it's almost impossible to discern the difference between ricotta and tofu, and the spinach, onion, and spices only make it better. I've served this to a few people who had no idea it was tofu until I told them, and I urge you tofu-phobes to give this a try.

This filling is the same as my Stuffed Shells recipe, and can be used either in this lasagna or stuffed into large shells.

Tofu-you-didn't Lasagna

Tofu-you-didn't Lasagna
1 box no-cook lasagna sheets
2 jars of your favorite marinara sauce
Filling
1 (15oz) pkg extra firm tofu, drained
1/2 medium onion, chopped
1 (10 oz) container frozen chopped spinach, thawed and drained
1/4 c fresh basil leaves, chopped
1 tbsp italian seasoning
1 1/2 tbsp minced garlic
2 tbsp olive oil
1/2 tsp salt
freshly cracked pepper
1 c shredded cheese (I used an Italian blend)
Extra cheese for the top

Preheat oven to 375. In food processor, process tofu until in small bits. Place in large bowl, and stir in remaining filling ingredients. In large greased 13x9 baking dish, layer sauce, noodles, filling, cheese, and repeat to fill pan. (It is important to note that no-cook noodles will expand when cooking, so don't allow them to overlap or touch the side of the pan). Cover with remaining sauce and cheese, and place into preheated oven. Allow to bake 30-40 minutes, until cheese and sauce is bubbly. Allow to rest for a few minutes before serving.

Sunday, November 26, 2006

Roasted Red Pepper Hummus

Wow, it's been awhile. The craziness of school has kept me away from the kitchen and camera, but it's good to be back in the apron. As I was pondering what recipes I wanted to make this week, I had a few jotted down, but this one caught my eye. I mean, what better way to make my entrance back than with one of my absolute favorite things? (If you're new to 28 Cooks, check out the hummus drop-dowm menu to your left - I'm a tad addicted)

This is a great whip-up-in-10-minutes thing, which is perfect for all of those holiday parties that are coming up. All of the ingredients can be on hand in your pantry for when you need to whip up a quick little appetizer for guests. And not only is it tasty, but it's a very healthy alternative to some of those other dips loaded with mayonnaise, cream cheese, and sour cream.

Roasted Red Pepper Hummus

Roasted Red Pepper Hummus
1 (15 oz) can garbanzo beans, drained and rinsed
1/2 c roasted red peppers
2 tbsp lime juice
1 tbsp tahini
1 clove garlic, minced
1/2 tsp cumin
1/4 tsp cayenne pepper
1/4 tsp salt
1/4 tsp cracked black pepper

Combine all ingredients in a food processor until smooth. Or, if you're like me and want to retain some texture, mash garbanzos with a potato masher to desired consistency, throw the rest of the ingredients in the food processor until smooth, and stir into mashed garbanzo mixture. Serve with tortilla chips, crackers, fresh vegetables, or use as filling in a wrap with sprouts and fresh veggies.

Wednesday, November 08, 2006

School Daze and Dreary Wednesdays

This is one of those weeks where everything that counts majorly is due in my classes. In light of the 2 14-page and 1 6-page papers I have to crack out by the end of the week, I've decided to take this week off from posting.

I'll be back next week with some new and exciting recipes!

Until then....

Violet

Thursday, November 02, 2006

Crab & Corn Bisque

I don't normally eat a lot of cream-based soups, but this is one that I absolutely adore. I can't make it through a winter of cold weather without making this at least 3 or 4 times at home, and I usually get a few requests from family and friends to make a pot for them too.

It's a super-simple, yet super-tasty recipe, and from start to finish will take you about 30 minutes.

Crab Corn Bisque

Crab & Corn Bisque
1/2 c butter
1 c onion, chopped
2 cloves garlic, minced
1/4 c flour
2 c clam juice
2 c vegetable broth
1 (10 oz) package frozen white corn
1/2 tsp cajun seasoning
1/4 tsp thyme
1/2 tsp white pepper
1 c half and half
1 c soymilk
1 lb fresh crabmeat, flaked

In a large saucepan, melt butter over medium heat. Stir in onion and garlic, and saute until translucent. Whisk in flour and cook for 2 minutes, stirring constantly. Slowly whisk in clam juice and vegetable broth. Bring to a boil. Add corn and seasonings, and stir well. Reduce heat and simmer for 15 minutes. Slowly stir in half and half and soymilk, as well as crab meat. Heat thoroughly and serve.

Sunday, October 29, 2006

Weekend Herb Blogging Roundup

I am honored to be hosting this week's Weekend Herb Blogging Roundup. We've got plenty of excellent recipes this week, and I'm sure you'll be adding a few of these to your "Must Try" list, as I have.

Unfortunately, due to circumstances such as moving my parents into their new home, and coming down with some sort of virus, I didn't get the chance to get into the kitchen to make my own herb recipe! However, I think you'll find plenty of good recipes in this recap. So without further ado, let's begin!

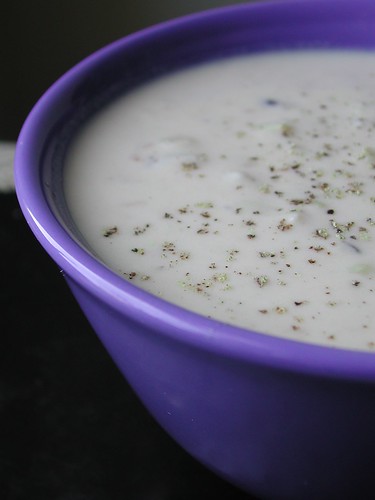
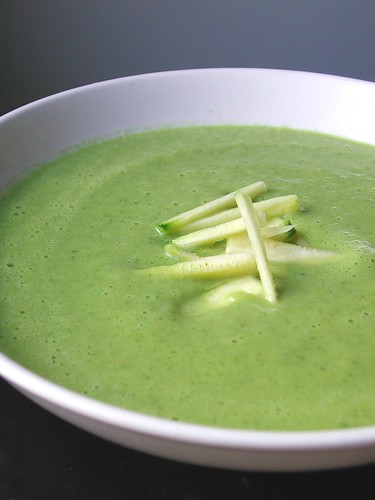
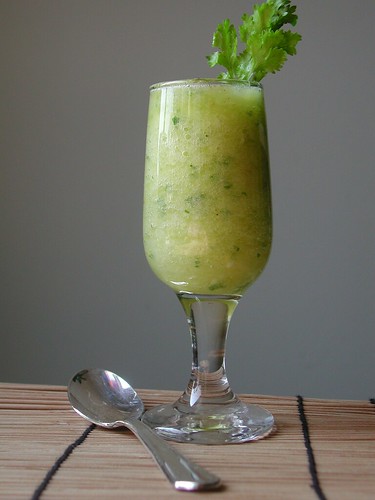
Absolute Green starts us off with a lovely recipe for a Broccoli and Green Tea Soup, which I simply must try. The combination of flavors must be absolutely insane!

The Chocolate Lady posted a lovely article about Lavender, and a suggestion for lavender tea, which sounds positively lovely.

Looking for some great food pictures? Head over to The Serendipitous Chef's site for a chock-full-o-photos posting with a recipe for Mustard Spinach Frittata. I must admit I've never tried mustard spinach, but this recipe definitely sounds like a good one to start with.

Before I introduce the next recipe, let me first say as of late, I have been completely obsessed with truffles and truffle oil. So this next recipe from Thyme for Cooking, Caramelized Onion Crespeu with Parsley and Truffle Oil, definitely piqued my interest. This is definitely on the "Must Make" list.

Ulrike from Germany gives us some great information on broad beans and provides us with a lovely recipe for Broad Beans, Pasta, and Bacon, which sounds simply tasty. It's also super simple, so you could whip this up in no time!

Who doesn't love garlic? Haalo provides us with a lovely recipe for a garlic anchovy dip, Bagna Calda, which I'm sure would be absolutely insane with fresh bread.

Nothing says "Fall's here!" like the taste and flavors of biting into a fresh apple. Veggie Gardening Tips has a great article on Heirloom Apples. It's chock full of information, so you won't want to miss this one.

Almost Turkish has a great recipe for Pub Style Bulgur Pilaf, which also went directly to the "Must Make" list. It's a great one-pot main or side dish.

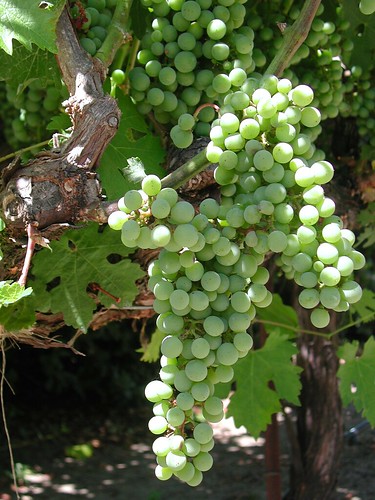
There's so many great posts this week that are loaded with great information. Calendula and Concrete's post on Cranberries and how they are harvested is no exception. There's also some great pictures.

Sugar Delirium has a great recipe for Ina's Roasted Brussel Sprouts. If you haven't liked brussel sprouts in the past, you should definitely try this recipe, because I'm sure you'll fall in love with them.

Gattina has gorgeous photos and recipe for Zucchini Boats with Corn Stuffing. My mouth is watering just looking at this post!

There's something very satisfying about making your own bread from scratch. Saffron Trail has a lovely recipe for Potato Rosemary Focaccia Pugliese, which looks incredibly amazing.

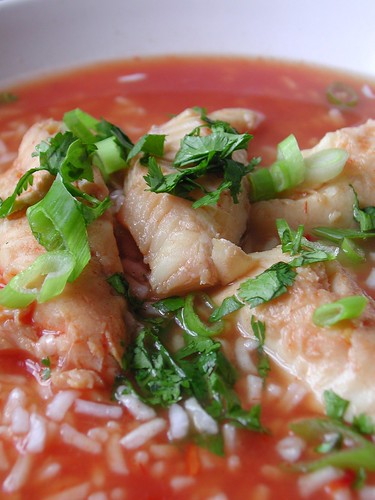
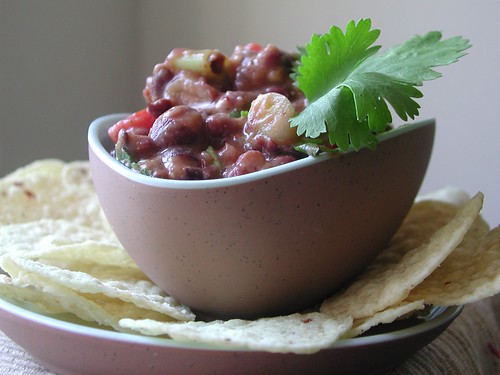
Kalyn's post this week is for a great-looking Thai Chicken Soup, and concludes her month long-postings with cilantro recipes. It looks awesome, and I think I'll have to try and veganize it.

Food Lover's Journey has such an incredible recipe for Five-Spice Tofu with Lemongrass Topping that I might have to give tofu another try. I adore lemongrass, and this recipe definitely makes good use of it.

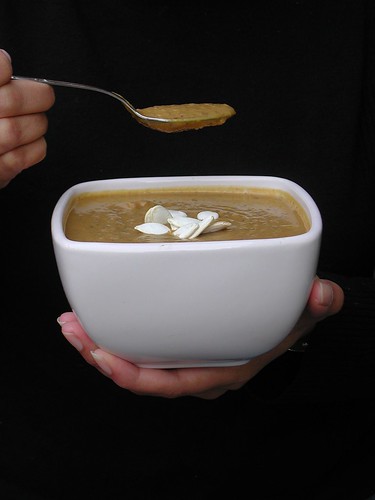
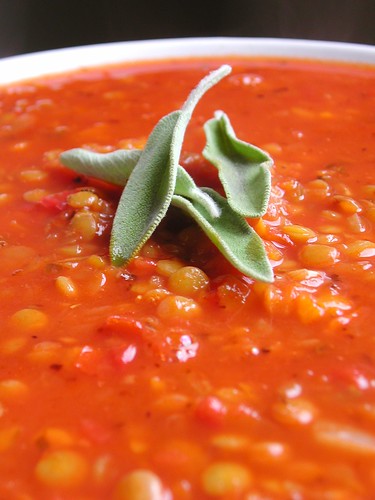
Christine Cooks up a lovely Butternut Squash Bisque with Maple Syrup and Sage which looks absolutely divine!

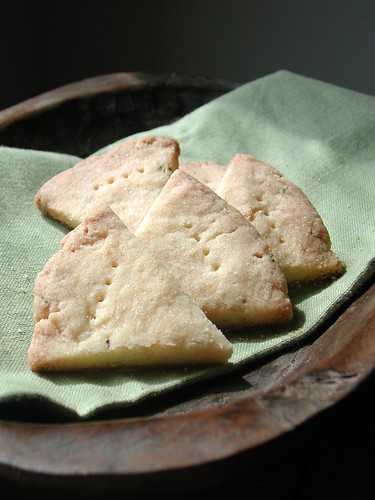
Our last recipe today in the roundup comes from Ask Ruth. It's a great article entitled "Great Food Fast" which gives some excellent tips for preparing meals with maximum efficiency.

Thanks to everyone for participating this week! Next week's roundup will be back at home at Kalyn's Kitchen.

Wednesday, October 25, 2006

Pickled Garlic

When I made the pickled vegetables a while ago, I was surprised by how mellow and tasty the garlic became after a few days of pickling. It completely loses the harshness and overpowering bite that raw garlic has, and takes on more muted tones.

While flipping through "Preserving the Harvest," I came across this recipe for pickled garlic. It looked like such a simple recipe, so I decided to give it a try. I was pleasantly surprised by the results.

These pickled cloves would be excellent by themselves, stuffed into olives for a quick appetizer, or even tossed into a martini. I also think they would be a flavorful addition to any dish that calls for garlic.

Pickled Garlic

Pickled Garlic

6 ounces white vinegar
4 ounces water
2 tsp coarse salt
1/8 tsp Old Bay seasoning
2 large heads of garlic, peeled
Rind of one lemon, in 1 or 2 strips if possible
1/2 tsp dill seeds
1/2 tsp celery seeds
1 small red chili pepper, whole

In a small saucepan, combine vinegar, water, salt, and Old Bay and bring to a boil. Add garlic and simmer 10-15 minutes, over very low heat. Place lemon rind, dill, celery seed, and chili pepper into a 1-pint jar (or 2 1/2 pints). Ladle in garlic cloves, cover with liquid, cap and seal well. Cool at room temperature. Store in fridge for 3-4 days before using.

Tuesday, October 24, 2006

Weekend Herb Blogging

Hello all! I will be this week's host for the Weekend Herb Blogging. If you haven't heard of it, Weekend Herb Blogging is a food blogging event sponsored by Kalyn's Kitchen where each week food bloggers around the world photograph and write about herbs, plants, veggies, or flowers, and on the weekend, we publish a Recap with links to all the posts. It's a great way to get some excellent recipes. For more information, click here!

Looking forward to showcasing all of this week's entries on Sunday!

Friday, October 20, 2006

Orange Pomegranate Mousse

While waiting in line for my usual coffee at Starbucks, I started flipping through the current edition of Martha Stewart's Everyday Food magazine. Although I didn't see too much that caught my eye, I did see a Orange Yogurt Mousse recipe that looked interesting. Although the idea of just orange and yogurt didn't intrigue me, the idea of the mousse did, so I mentally filed it away to be used at a later date.

A bit later, while doing some grocery shopping, I came across some fresh pomegranate juice. The mousse recipe immediately popped back in my head, and this is the end result.

I must admit I wasn't sure how it would all come together, but I fell deeply, madly, and truly in love with this from the very first bite. The pomegranate and orange lend a lovely base flavor to the tanginess of the yogurt, which all combines together into a light and refreshing wonderful dessert.

Orange Pomegranate Mousse

Orange Pomegranate Mousse
Zest from 1 orange
1 1/2 c heavy whipping cream
3/4 c sugar
1/8 tsp salt
1/2 c pomegranate juice
1 pkt unflavored gelatin
32 oz plain yogurt

Combine zest, 1/2 c heavy whipping cream, sugar, and salt in a small saucepan. Bring to a boil, lower heat, and simmer 5 minutes. Remove from heat, cover, and allow to sit for 20 minutes. In a small bowl, pour pomegranate juice. Sprinkle gelatin over juice, and set aside for 5 minutes. Meanwhile, bring cream mixture back to a simmer. Remove from heat and pour into a large bowl. Add juice mixture and whisk well. Slowly whisk in yogurt. Cover and place into refrigerator for 30 minutes. Remove from refrigerator. With cold metal bowl and beaters, beat remaining whipping cream until semi-stiff. Fold into yogurt mixture. Spoon into 6 bowls or wine glasses, and allow to set in refrigerator for 3-4 hours. Garnish with fresh orange segments or pomegranate seeds.

Wednesday, October 18, 2006

Curried Pumpkin and Black Bean Soup

Although I'm not a winter person at all, I must admit I do enjoy a month or two of colder weather. I love rushing home in the cold with the thoughts of a warm blanket and a bowl of comforting soup waiting for me.

Typically, I am not a huge fan of cream-based soups, and much prefer broth-based. However, I do love a pureed soup, and this is such a wonderful combination of flavors. Amazingly enough, the pumpkin and the black beans are wonderful together, and the curry and cumin give it even more of a unique flair.

My roommate's mother, Jan, who is an amazing cook, graciously offered up this recipe. Although I've added the black beans, changed the spices a bit, and made it vegetarian, it pretty much remains true to her recipe.

Curried Pumpkin & Black Bean Soup

Curried Pumpkin and Black Bean Soup
2 tbsp butter
1 c onion, diced
2 cloves garlic, minced
1 1/2 tsp curry powder
1/2 tsp cumin
1/2 tsp salt
2 tbsp flour
3 c soymilk
2 c vegetable broth
2 c canned pumpkin puree
1 (15 oz) can black beans, drained and rinsed
1/2 tsp cayenne pepper
1/8 tsp dried thyme
1/8 tsp nutmeg

Melt butter in large saucepan. Add onion and garlic, and saute over medium high heat until tender. Add curry powder, cumin, and salt. Saute for an additional minute or so. Whisk in flour, and whisking constantly, cook for an additional minute. Slowly whisk in soymilk. Allow to simmer for a minute before adding remaining ingredients. Bring to a boil, lower heat, and simmer 5 minutes. Blend until smooth, either using a stick blender, or pouring into a blender in batches. Return to pan and simmer an additional 5 minutes. Serve with toasted pumpkin seeds as garnish.

Monday, October 16, 2006

Basil Wine Jelly

One of my favorite things to eat is cheese. Soft cheese, hard cheese, French cheese, goat cheese - almost any kind of cheese you name, I like. Last night, I had a lovely cheese sampler plate at one of my favorite restaurants, and it got me thinking about things that go well with cheese. My mind immediately went to the Hot Pepper and Garlic Jelly I made for a friend's wedding, which paired beautifully with the cheese plate.

Almost nothing pairs better with cheese than wine, so I decided to start with a nice, meaty shiraz. The fresh basil leaves, which are steeped in the wine, add just enough of flavor, so as not to be overwhelming. This jelly pairs wonderfully with this super sharp cheddar, although I'm sure it would be just as wonderful with a goat cheese.

This is also a very easy recipe to make, and active cooking and canning time is about 30 minutes. I've also included some easy canning instructions, which won't require any special equipment.

Basil Wine Jelly

Basil Wine Jelly
Yield - 4 (1/2 pt) jars
2 c red wine
1/2 c basil leaves, cut into strips
1/4 c lemon juice
3 1/2 c sugar
1 (3 oz) pkg liquid pectin (Certo or whichever brand is available)

Bring 1 c wine to boil in a small saucepan. Add basil leaves, remove from heat, and cover. Allow to steep for 30-45 minutes. Strain out basil leaves and discard. Add remaining wine, lemon juice, and sugar to large saucepan, as well as the basil wine. Bring to a rolling boil, and boil 1 minute. Stir in liquid pectin, stirring constantly, and return to a rolling boil. Boil for 1 minute, stirring constantly. Remove from heat. Pour into 1/2 pint jars and seal.

*The easiest way to can is this - wash and dry canning jars thoroughly. Place lids and rings in a pot of barely simmering water. Once jelly is ready, fill a jar, leaving about a 1/8" headspace. With tongs, remove lid and ring from water, place on jar, and tighten, although not all the way. Turn jar upside down on a dishtowel. Repeat with remaining jars. Allow to cool for 10-15 minutes. Turn upright and allow to seal. Tighten rings on all jars. If any of the jars don't seal, simply store in the refrigerator once cool. The other jars can be stored in a pantry for 8 months to a year, if it lasts that long.

Thursday, October 12, 2006

Curried Zucchini Soup

Who doesn't love a feel-good recipe that takes only 20 minutes to prepare? I'm in love with this soup, and the ease of preparation is only the beginning. It utilizes one of my favorite vegetables and a spice I'm just wild about. And since we're heading into soup season, it's time to start pulling out those stock pots for warm and delicious meals. Since this recipe has only 7 ingredients, most of which are already stocked in your pantry, you have no excuse to not try this amazing soup.

Curried Zucchini Soup

Curried Zucchini Soup
2 tbsp olive oil
4 c sliced zucchini
1 c onion, roughly chopped
1 clove garlic, minced
1 tsp curry powder
1 c vegetable broth
1/2 c soymilk

Wash and slice zucchini into 1/4" slices. Heat olive oil in large saucepan over medium-high heat. Add zucchini, onion, and garlic to pan. Saute 5 minutes, until zucchini starts to become translucent. Add curry powder, stir well, and cover pot. Lower heat to low, and cook an additional 10 minutes, or until zucchini is tender. Place zucchini mixture into blender with 1/2 c vegetable broth. Blend until pureed. With motor running, add remaining broth and soymilk. Season to taste with salt and pepper. Serve immediately, or chill and serve cold.

Monday, October 02, 2006

Cilantro Pesto Dip

Every good cook knows it's important to have a few quick and easy to prepare recipes to whip out when unexpected guests arrive. This is one of those that you can make within a matter of minutes, and it's extremely tasty.

This dip combines two of my favorite things, pesto and fresh cilantro. By using low fat or nonfat yogurt, it's easy to keep the fat and calorie content to a minimum. This dip is wonderful served with plantain chips, tortilla chips, or pita wedges.

Cilantro Pesto Dip

Cilantro Pesto Dip
12 oz plain yogurt
3 tbsp prepared pesto (either homeade or purchased)
1/4 c fresh cilantro, chopped
2 tsp fresh lemon juice
salt/pepper to taste

Combine all ingredients in a bowl and whisk well. Serve immediately, or chill for a bit to allow flavors to combine.

Monday, September 25, 2006

Because free is meant to be shared....

When I first found this offer online, I was a tad bit skeptical, since free things always seem to have some sort of strings attached. However, you are looking at my brand-new free Senseo Coffee Maker, which arrived in the mail today.

Senseo

All you have to do is fill out a short survey, promising to tell some people about it, and they send you a free coffee pot, along with the pack of free pods you see pictured. Of course, if you're like me, and prefer to use your own favorite coffee, I'd invest 10 clams in one of these, which allows you to make your own pods.


Sign up for your free one too!

Friday, September 22, 2006

That time of year....

It's that time of year again, when the semester has started back up again, and I find myself increasingly short on free time. Things will be slow around here for the next few weeks or so while I get into the routine, and then hopefully the posts will go back to at least 3 or 4 each week.

In the meantime, I did update my Top 5 on the side with some lovely soups, just in time for the first day of fall. I'm also up on a meme, so look for those answers sometime this weekend.

Until then, please bear with me and my once-or-twice per week postings!

Monday, September 18, 2006

Hot and Sour Poached Halibut

There's something about poached fish that I really enjoy. Not only does the poaching ensure the texture of the fish is perfectly soft and cooked to perfection, but it's also a healthier preparation.

I was just at one of the local restaurants called Rice and Noodles, where most of their dishes come served in large bowls, usually over rice or noodles. It's always great to have an entire meal in one bowl, and this dish is perfect for it. This recipe is adapted from "101 Quick and Delicious Recipes."

It's a light dish with a flavorful broth that's perfect for lunch or dinner.

Poached Halibut

Hot and Sour Poached Halibut
2 tbsp soy sauce
2 lbs halibut filets or steaks
1 quart vegetable stock
3 tbsp tomato paste
1/4 c honey
2 1/2 tbsp cider vinegar
12 thin slices fresh ginger
1/2 tsp crushed red pepper
scallions and cilantro, to garnish

If unable to find halibut, a similar fish, such as cod or haddock. Place in shallow dish, and sprinkle soy sauce on both sides of each piece of fish. Refrigerate for 15 minutes. In a flat bottomed pan, place vegetable stock, tomato paste, honey, vinegar, ginger, and red pepper. Over medium heat, bring to a boil, lower heat, and simmer for 12 minutes. Add fish to pan, and cook for 10 minutes, or until fish is almost done. Turn off heat, and allow to sit for an additional 2-3 minutes. Serve over rice, garnished with scallions and cilantro.

Monday, September 11, 2006

Sundried Tomato Tapenade

Usually I make a list of ingredients for a recipe, and based on just reading them, I'll know whether or not a recipe will turn into something I like. But sometimes, even though you know the ingredients ahead of time, it's not until the final taste that you realize you have fallen very deeply into love.

This definitely goes on my list as one of the tastiest things I've made in the past few weeks. That's not to say the rest of the recipes weren't tasty, but sometimes one stands out.

Looking for a quick appetizer to serve with a glass of wine, or an elegant snack? Enter this tapenade. I'm already in love with sundried tomatoes, but combine them with garlic, basil, rosemary, and red wine vinegar, and you've got yourself something amazing. I imagine this would be excellent on almost anything you spread it on, from crackers to cheese to the base of a pizza.

Sundried Tomato Tapenade

Sundried Tomato Tapenade
1 c sundried tomatoes, either oil packed or dried
2 cloves garlic
1 tbsp capers, drained
1 1/2 tsp italian seasoning
2 tbsp olive oil
1 tbsp red wine vinegar

If tomatoes are dried, soak in boiling hot water for 30 minutes and drain well. If oil-packed, drain well. Place into food processor and process until coarsely chopped. Remove from processor and place into a bowl. Add garlic to food processor, and mince well. Add capers, and mince again. Return the tomatoes to the processor as well as all remaining ingredients. Process until texture is slightly rough, but well mixed. Chill for 15 minutes before serving.

Thursday, September 07, 2006

Sun-dried Tomato Peppercorn Biscotti

When I hear biscotti, I normally think of the sweeter varieties, perhaps dipped in dark chocolate, and accompanying a good espresso or cup of coffee. I'm a huge fan of biscotti, and I normally like to try a new variety every so often. I think, however, that some of my most favorite biscotti are the savory ones. They pair so perfectly with cheeses and wines and are wonderful to have on hand for impromptu parties.

I love this variety. It has one of my most favorite ingredients in it, green peppercorns, which are fantastic with the sun-dried tomatoes. These are very easy to make, and freeze well, so you can always have them on hand. Serve with a mild cheese, such as Edam or Monterey Jack, or with a nice red wine.

Sun-dried Tomato Biscotti

Sun-dried Tomato Peppercorn Biscotti
(courtesy of The Good Stuff Cookbook)

1/4 c (packed) sun-dried tomatoes, prepared without oil
2 c flour
2 1/2 tsp baking powder
1/2 tsp salt
1 tsp green peppercorns, well drained and roughly chopped
1 tsp dried rosemary, crumbled
1 egg (or egg substitute)
1/4 c olive oil

Preheat oven to 350. Foil cover and grease a baking sheet. Snip the tomatoes into 1/4" pieces, cover with hot water, and allow to soak for 20-30 minutes. Meanwhile, sift flour, baking powder, and salt into a large mixing bowl. Stir in peppercorns and rosemary. Drain the tomatoes, saving soaking liquid. Pat the pieces between paper towels to remove excess moisture. In a small bowl, beat egg (or substitute) with 1/4 c soaking liquid. Add the oil and mix well. Add wet ingredients into dry, and stir until just combined. Stir in tomato pieces. Mix well with hands until a stiff dough is formed. Divide dough in half, and shape into 2 loaves, about 2 1/2" wide.
Place into preheated oven and bake 25 minutes, until firm to the touch and deeper in color, but not overbrowned. Remove from oven and cool on wire racks, 10-15 minutes. Lower oven setting to 275.
Slice the loaves on the diagonal 1/2" thick, lay on cookie sheet, and return to oven for 20 minutes. Turn off the oven and leave the biscotti in the oven for 30 minutes more with the door slightly propped open. Remove from oven and cool on wire racks. Store in an airtight container for up to 3 weeks, or wrap in foil and freeze for up to 3 months. If frozen, thaw without unwrapping, spread on baking sheet, toast in 300 degree oven for 10 minutes or so.

Wednesday, September 06, 2006

Chipotle Black Bean & Rice Stew

Lately, it's been sort of rainy and damp here in Pennsylvania. I got home from class last night, and after walking back to my car in a cold drizzle, all I wanted was something hot and satisfying.

I love this stew. It's exactly the sort of feel good soup you crave when it's cold and rainy outside. It's filling, full of good-for-you things, and deeply satisfying.
It's loosely based on a recipe from Rachael Ray, whom I can't bear to watch on TV, but can appreciate some of her recipes.

This is also a quick recipe to make, and most things are stocked in your kitchen. You can easily have this on the table in no more than 45 minutes.
Chipolte Black Bean Stew

Chipotle Black Bean
2 tbsp olive oil
1 bay leaf
1 c vidalia onion, minced
2 celery ribs, chopped
3 cloves garlic, chopped
2 Knorr Chipolte Bouillon cubes*
1 c frozen white corn kernels
2 (15 oz) cans black beans
2 tsp chili powder
1 tsp ground coriander
1 1/2 tsp cumin
1 (15 oz) can diced tomatoes
1 (8 oz) can tomato sauce
1 (32 oz) carton vegetable stock
1 c white rice

Heat large pot over medium-high heat. Add olive oil, and saute bay leaf, onions, celery, and garlic for 3-4 minutes, or until tender. Crumble chipotle cubes into pot. Add corn and both cans of undrained black beans. Add chili powder, coriander, and cumin, stirring well. Add tomatoes, tomato sauce, and stock. Cover pot, raise heat to high, and bring to a boil. Add rice, and bring back to a boil. Lower heat, cover, and simmer until rice is tender.

*If unable to find Knorr Chipotle Bouillon cubes in your area, then substitute 1-2 well-minced canned chipotle peppers.

Wednesday, August 30, 2006

Red Chile Sauce

Those that know me, or those that have been with 28 Cooks for awhile, know that I absolutely adore hot spicy foods. I recently purchased some dried red chilies to make the Cilantro Potato Salad. Unfortunately, they were only sold in a large container, so I've since been trying to find things to do with the leftovers.
I haven't made a new hot sauce in a bit, and I wanted to try and capture the smokiness of the dried chilies. This sauce is quite flavorful and has its own personality, so it would be perfect as a sauce over beans, enchiladas, rice, or a million other things.

Red Chile Sauce

Red Chile Sauce
2 1/4 c water
15 dried thai chilies
1 1/2 tbsp olive oil
1 clove garlic, minced
1 tbsp flour
1 tsp white vinegar
1/4 tsp dried basil
1/4 tsp cumin
1/2 tsp salt

Place water and chilies in a small saucepan. Bring to a boil. Remove from heat, cover, and allow to soak for 45 minutes. Place chilies and 1 cup of soaking liquid in blender or food processor. Process for 2-3 minutes. Turn into a sieve and rub through sieve into bowl to eliminate small bits of peel. Rinse blender with an additional 1 cup soaking liquid and pour over remaining pulp in sieve.
In small saucepan, heat oil over medium high heat. Add garlic, and saute 30 seconds. Add flour, and whisking well, cook for 1 minute. Slowly add pepper liquid and remaining ingredients. Bring to a boil, lower heat, and simmer for 30 minutes, until thick. Allow to cool, and serve over rice, beans, or anything that could use a little spiciness.

Monday, August 28, 2006

Garden Vegetable Tomato Sauce

This is my favorite time of year, when all of the end of summer produce is getting out of hand, and people are begging people to take their extras. Since I live in an apartment in the city, I have no outside space for a garden. If I did, I would definitely have it bursting with fresh veggies and herbs, but for now, I must simply wait for the goodwill of others to fill my produce drawers.

This week, I was gifted with a lovely eggplant, some fresh summer squash, and some gorgeous blood red tomatoes. I knew right away I wanted to combine them into a lovely fresh-tasting vegetable tomato sauce.

The ingredients are so simple in this recipe, and it gives the produce a perfect stage to showcase its flavorful ripeness. It's so tasty you may be tempted to eat it by itself, but it would also be incredible over pasta, rice, or wholewheat couscous.

Garden Vegetable Tomato Sauce

Garden Vegetable Tomato Sauce
3 tbsp olive oil
2 cups yellow squash, chopped
1 cup red onion, chopped
2 cups eggplant, chopped*
3 cloves garlic, minced
1 tsp fennel seed, crushed
1 c tomato, chopped
1 (28 oz) can crushed tomatoes in puree
2 tbsp balsamic vinegar

In a large saucepan, heat 3 tbsp olive oil. Add squash and onion, and cook over medium heat for 5 minutes. Add eggplant, cook an additional 3 minutes. Add garlic and fennel seed, and saute 3 minutes. Add tomato, crushed tomatoes, and balsamic vinegar. Stir well, and simmer over low heat until vegetables are tender. Serve over pasta, rice, or couscous.

*To prepare my eggplant, I always slice it lengthwise a few times, sprinkle with salt, and allow to sit for 15-20 minutes. The salt draws out the bitterness. Rinse off well before chopping.

Wednesday, August 23, 2006

Black Bean Salsa

I've made the Bueno Fresh Salsa so many times this summer for parties, picnics, and to take into work, I just needed something new.

As you can tell from my archives, I'm a huge fan of black beans. And as someone said in the comments of the Southwest Couscous salad, there isn't a better combination than black beans, cilantro, and lime juice.

Those 3 ingredients make up the backbone of this salsa, and although the ingredients list is somewhat simple, and will take about 15 minutes to make start to finish, it's got a lovely rounded and full flavor.

Black Bean Salsa

Black Bean Salsa

1 (30 oz) can black beans, drained and rinsed
1 c diced yellow bell pepper
1/4 c minced red onion
1/2 c minced fresh cilantro
1 clove garlic, minced
4 tbsp fresh lime juice
1 tbsp olive oil
4 dried thai chilies, minced
1/4 tsp cumin
1/4 tsp dried basil

Combine all ingredients well in large bowl. Allow to chill in the refrigerator for an hour or so before serving. Serve with tortilla chips, or mix into rice or couscous for a very quick salad.

Thursday, August 17, 2006

Pickled Vegetables

Everybody Likes Sandwiches (great blog name, btw, because who doesn't like sandwiches) recently had a post about making refrigerator pickles. It immediately took my mind back to a recipe for pickled vegetables that I haven't made in a very long time.

Refrigerator pickles are one of those things that you don't normally make, but when you do, you remember how tasty they can be. This recipe was originally from Alton Brown, but of course I've made some changes. I think you'll find these tangy pickles just as addictive as I do. It's also going to help with some of that produce bounty that the end of summer brings.

Pickled Vegetables

Pickled Vegetables
1/2 red onion, chopped
1 kirby cucumber, 1/4" slices
8 oz baby carrots, cut in halves
4 cloves garlic, cut in halves
1 cup water
1/2 c white vinegar
1/2 c sugar
1 1/2 tbsp sea salt
1 tsp yellow mustard seeds
1/8 tsp turmeric
1 tsp celery seeds
1 tsp pickling spices
1 tsp peppercorns

Layer onion, cucumber, carrots, and garlic cloves in a large jar. Combine remaining ingredients in a small saucepan. Bring to a boil and simmer for 4 minutes. Slowly pour liquid over vegetables, filling to the top of the jar. Allow to cool, then top jar off with any remaining liquid. Refrigerate at least overnight before digging in (if you can).

Wednesday, August 16, 2006

Southwest Couscous Salad with Chipotle Lime Vinaigrette

Here is it, already the 16th of August, and summer is almost over. School will be starting in the next few weeks, and the dog days of summer will soon turn to the crispy days of fall. It's about this time of year when people start to realize summer will soon be closing its doors for the year, and hustle to have those last minute picnics and get-togethers.

Vegetarian Times had a lovely little couscous salad in the latest issue that inspired me to make this. While the main ingredients are basically the same, I completely re-made the dressing into this tangy little chipolte lime vinaigrette. And not only is this couscous salad tasty, but it's also pretty nutrionally sound, with olive oil being its only added fat. It's also got a lovely look to it, and I promise it will be a hit at whatever meal you serve it.


SW Couscous Salad

Southwest Couscous Salad with Chipotle Lime Vinaigrette
1 1/2 c water
1/2 tsp salt
1 c uncooked couscous
1 (15 oz) can black beans, drained and rinsed
1 jalapeno, seeded and minced
1/2 c red onion
2 plum tomatoes, seeded and diced
1/4 c fresh cilantro, minced

Chipolte Lime Vinaigrette
4 1/2 tbsp olive oil
4 1/2 tbsp lime juice
2 tsp adobo sauce (from canned chipotle chilies)
1/2 tsp crushed red pepper flakes
1 tsp toasted cumin seed, crushed
3/4 tsp dried basil
3/4 tsp sugar

Bring water and salt to a boil. Add couscous, cover, and remove from heat. Allow to stand 5 to 10 minutes, until all moisture is absorbed. Fluff with a fork, and transfer to a large mixing bowl. Cool. Add beans, jalapeno, red onion, and tomato. In food processor, combine all vinaigrette ingredients. Process until well combined. Add to mixing bowl, and stir well. Stir in fresh cilantro. Serve and enjoy!

Sunday, August 13, 2006

Spiced Soynuts

Soynuts are a great source of protein and a wonderful snacking idea. A half cup provides 7 grams of fiber and 34 grams of protein. I'm a huge fan of the seasoned and spicy soynuts I find in my health food store, but as I was reading the label, I discovered that egg whites are a common ingredient.

These are a great egg-free variation, and the spice possibilities are almost endless. And rather than heat up my kitchen with the oven on, I did these in a half batch in the toaster oven and they turned out marvelously. Warning - these can be extremely addictive.

Spiced Soynuts

Spiced Soynuts
2 cups roasted unsalted soynuts*
1 1/2 tbsp olive oil
1/2 tsp cumin
1/2 tsp chili powder
1/2 tsp curry powder
1/2 tsp garlic salt
1/4 tsp cayenne pepper
1/4 tsp ground ginger
1/4 tsp cinnamon

In a bowl, stir soynuts and olive oil together. Place into a brown paper bag and shake with spices until well coated. Place into preheated oven and bake 35-40 minutes, stirring occasionally. Remove from oven, pour onto a papertowel lined plate, and allow to cool. Store in airtight container.

*If you can only find salted soynuts, just use garlic powder in place of garlic salt.

Tuesday, August 08, 2006

Thai Shrimp Lettuce Wraps

As you can tell from most of my recipes on here, I eat a primarily vegetarian diet. However, in the sidebar, you'll notice I call myself a vegaquarian, so I do occasionally eat some sort of seafood or fish.

This was a recipe I used to make with chicken quite frequently back when I was a meat eater. My friend Lina suggested making it with shrimp, and I'd have to say it's a perfect fit.

Although some of the ingredients in the sauce sound a bit interesting, like the orange marmalade, I can guarantee you it's a perfect partner to the fresh ginger, garlic, and soy sauce. Serve in a lettuce wrap, or just over rice - either way, I think you'll be in love.

Thai Shrimp Lettuce Wraps

Thai Shrimp Lettuce Wraps
2 lbs smaller-sized shrimp, peeled
1/2 c soy sauce
1/3 c honey
3 scallions, minced
3 cloves garlic, minced
1 1/2" piece ginger, peeled and minced
1 tsp pepper
1 1/2 tbsp sesame oil
1 tbsp fresh basil, chopped
Butter, red leaf, or romaine lettuce
1 c cooked jasmine or basmati rice
6 tbsp rice vinegar
5 tbsp orange marmalade

Peel shrimp and place into a large ziploc bag. In a food processor, combine soy sauce, honey, scallions, garlic, ginger, pepper, and sesame oil until well combined. Pour over shrimp and seal bag. Allow to marinate 25-30 minutes. Drain shrimp from marinade, reserving marinade for later. Heat wok or large pan over medium-high heat. Add shrimp, and stirfry until done, about 5-7 minutes. Remove shrimp from pan with slotted spoon, and place into a serving bowl. Stir in fresh basil. Add rice vinegar and marmalade to pan, along with remaining marinade. Bring to a boil, and allow to boil 2 minutes. Remove from heat.
To assemble lettuce wraps, place a leaf of lettuce on a plate. Scoop some rice onto leaf, and then top with a healthy portion of shrimp. Pour a small amount of sauce over shrimp. Wrap, eat, and repeat!

Monday, August 07, 2006

Asian Green Beans

I think summer has to be the greatest season for any vegetarian, at least on the East Coast. Around here, we don't have access to fresh fruits and vegetables year-round. But living in the middle of Amish and farming country, summer is the time you can't make a move without running into a fresh vegetable stand.

I saw these green beans and knew I had to take some home. Although I plan on using them in their fresh and raw state, I also just wanted something quick to whip up for a side dish.

These remind me of the ubiquitious green beans that can be found on almost every single Chinese buffet I've ever seen. From start to finish, they take about 10-15 minutes to make, so you can have these delicious beans on the table in no time at all. The fresh ginger and garlic make these especially savory.

Asian Green Beans

Asian Green Beans

1 lb fresh green beans, trimmed
4 cloves garlic, minced
6 thin slices of fresh ginger
1 scallion, minced
3 tbsp sesame oil
1 tbsp sugar
2 tbsp soy sauce
1/4 c water

Bring a pot of water to a boil. Add beans and boil for 3 minutes. Remove from pot and immediately plunge into a bowl of cold water. Allow to sit for a minute or two, then drain and set aside. In a wok over medium high heat, heat sesame oil. Add garlic, ginger, and scallions, and saute for 2 minutes. Add sugar and soy sauce, and bring to a boil, stirring well. Add beans and water, and cook for 3 minutes, or until beans are at desired tenderness. Garnish with toasted sesame seeds.

Friday, August 04, 2006

Mediterranean Stuffed Tomatoes

It's hot everywhere. I just got home from suffering through a dry 122 degrees in California, and now I'm suffering through a humid 103 degrees here in Pennsylvania. Anyone that cooks knows that the last thing you want to do on a sticky hot day is heat up the kitchen by turning on the oven.

That's why these are perfect. The couscous cooks up quickly, and the rest is a matter of just chopping and mixing. It's also a perfect way to use up the huge crop of fresh tomatoes that are ready right about this time.

Med stuffed tomatoes

Mediterranean Stuffed Tomatoes
4 large tomatoes
1 c cucumber, peeled and diced
1 c cooked couscous
1/2 tsp grated lemon zest
2 tsp fresh lemon juice
1 tbsp balsamic vinegar
3/4 tsp Italian seasoning
1 clove garlic, minced
1 tbsp fresh basil, minced
3 oz feta cheese, crumbled
Salt/pepper to taste

Slice tops off of tomatoes. Scoop out the insides, discarding as many seeds as possible. Chop the rest of the flesh and place into medium bowl. Salt and pepper the insides of the tomatoes and set aside. Add remaining ingredients into bowl and stir well. Fill each tomato with a heaping portion of the couscous mixture. Serve and enjoy! (The filling is also wonderful by itself, and would make a great salad or side.)

Wednesday, August 02, 2006

Well hello!

KJ Grapes

I had such an excellent time on vacation. It's the first time in a long time that I've had more than 3 consecutive days off from work, so it was definitely a well needed time.

The purpose of the trip was to attend my uncle's wedding in San Bernadino. It was a lovely affair, despite being an outdoor wedding on a day the thermometer hit 122 degrees. Seriously, do you have any idea how hot that is?? I felt rather lucky, however, that I was able to get away with just a simple dress and sandals as opposed to the 3-piece suits the groomsmen were wearing.

Although it was great to see family, the highlight of my trip was definitely the time we spent in San Francisco and the Napa Valley. Although I'm originally from Southern California, I've never been to the Northern parts of it. I was thoroughly enchanted with it, and fell truly, madly, and deeply in love with it.

Hook and Ladder

I didn't get to spend as much time as I wanted in the Napa Valley, but I did hit a few vineyards and did some wine tasting. I tasted quite a few excellent wines, and wished I had more room in my luggage to bring home more than 3 bottles.

All in all, it was a fabulous trip. I took far less pictures that I thought I would. I blame it on being so friggin' hot. But I'll leave you with one of my most favorite pictures from the trip. This is a little girl we saw at one of the In-N-Out Burger joints we stopped at. (BTW, the vegetarian "Grilled Cheese" they make is quite outstanding) Check out what she has tucked into her pocket.

Little Lady Handgun

I like to call this picture "You know you're in LA when...."

I'll see you tomorrow with something tasty!

Wednesday, July 19, 2006

Bon Voyage!

It will be quiet 'round these parts for the next 10 days. I'm off to visit family in California, and do a bit of vacationing in Napa Valley and San Francisco. I'm looking forward to sampling some of the local cuisines and wine, and I'll be sure to bring back plenty of pictures.

Until then......


San Fran

Monday, July 17, 2006

Fusion Black Bean Dip

Bean dips are such a great alternative to fattier dips and spreads loaded with mayo and sour cream. Not only that, but you're adding some lovely protein and fiber in there as well.

This is a great tasting dip, and the addition of fresh ginger really takes it over the top. Serve with fresh veggies, tortilla chips, or use as a base for a great layered dip. No matter how you eat it, you'll love it!

Fusion Black Bean Dip

Fusion Black Bean Dip
2 cloves garlic, peeled
2 tbsp fresh lime juice
2 tsp fresh ginger, grated
1 tbsp tomato paste
1 tsp cumin
1 tsp chili powder
1/4 tsp salt
1 tsp hot pepper sauce
1/4 c cilantro, roughly chopped
2 scallions, diced
1 (29 oz) can black beans, rinsed and drained
1/2 c tomatoes, chopped

In a food processor, combine garlic, lime juice, ginger, tomato paste, cumin, chili powder, salt, and hot pepper sauce. Process until well combined. Add remaining ingredients, except tomato, and pulse a few times until combined but still chunky. Transfer dip to a bowl and stir in tomato. Chill in the refrigerator for an hour before serving.

Thursday, July 13, 2006

Tropical Apricot Mousse

Summer is probably one of the most social times of year, other than that November/December holiday season. People are out and about, having cookouts and barbeques, and just getting together more often.

At most picnics, there's usually heavy pasta and potato salads, chips and other nibblies, and tons of other diet killers. The last thing you want to do is finish it off with a heavy dessert.

That's where this comes in. It's light, refreshing, and relatively low in calories and fat. It's also very tasty, and would work very well as a breakfast item too.

Tropical Apricot Mousse I

Tropical Apricot Mousse
1/2 c dried apricots
1/2 c pineapple juice
1 c soy yogurt (or plain yogurt)
2 bananas, peeled
2 ice cubes

In a small saucepan, add apricots and pineapple juice. Bring to a boil. Lower heat, cover, and simmer 10 minutes. Remove from heat and cool. Place apricots and juice into blender or food processor. Add remaining ingredients and puree until smooth. Chill for at least an hour before serving. Garnish with freshly cracked pepper if desired.


Smoked Mozzarella Eggplant Rolls

You know how your tastes change as you become older? Eggplant was one of those things I hated as a child. It always felt too mushy and had a really bad flavor. Even though my mother was an exceptional cook, there wasn't anything she could do to make eggplant pleasing to my underdeveloped palate.

However, now I adore eggplant. It's got a lovely flavor, and provided you don't overcook it, it has a lovely texture. This is by far one of my favorite appetizers. The smokiness of the mozzarella combined with the fresh tomato and pesto is quite delicious. This is a great appetizer as it can be assembled ahead of time and then reheated when needed.

Sm. Mozz Eggplant Rolls III

Smoked Mozzarella Eggplant Rolls

1 large eggplant
8 slices smoked mozzarella
2 plum tomatoes, cut into 8 thick slices
3 tbsp pesto
Balsamic vinegar and olive oil for drizzling (optional)

Cut eggplant into 10 thin slices, discarding 2 outside pieces. Sprinkle with salt on both sides and set aside. Allow to rest for 20 minutes, then rinse well under cold water to remove salt. Pat dry with paper towels. Heat grill or grill pan on medium high heat. Spray liberally with oil. Grill eggplant slices for 8-10 minutes, flipping once. Remove from heat. Place a slice of mozzarella in the center of each slice. Top with a small dollop of pesto, then place tomato on top. Fold the eggplant over the filling, and place seam side down back on grill(pan). Heat until cheese begins to melt. Serve with drizzled balsamic vinegar and oil if desired, or serve with marinara sauce.

Monday, July 10, 2006

39-Spice Hummus

Since hummus is so easy and quick to make, I haven't purchased pre-made hummus in years. But I was at the grocery store, needing something quick to throw in the fridge at work, and the Tribe of Two Sheiks happened to be on sale. On a whim, I picked up the rather tasty "40-Spice" version.

Although I doubt the inclusion of 40 different spices, I liked the name. I'm sure I didn't hit all the spices with my version, but I think you'll find it pretty darn tasty.

39 Spice Hummus

39 Spice Hummus

1 (30 oz) can chickpeas, drained and rinsed
1/4 c minced onion
2 tbsp minced fresh parsley
2 tbsp lemon juice
3 cloves garlic, minced
1 tsp garam masala*
1/4 tsp cayenne pepper
1/4 tsp salt
1/4 c olive oil

Process chickpeas in processor or with potato masher until well mashed. Stir in remaining ingredients. Chill in the refrigerator for an hour or so for flavors to meld. Serve with tortilla chips or fresh vegetables. (If you can't locate garam masala in your grocery store spice section, here's one to make your own.)

Thursday, July 06, 2006

Chipotle Dip

I know I say this all the time, but seriously - this is one of my most favorite recipes to make. If I had to pick my top 5 "most made" recipes, this is definitely one of them.

I'm a huge lover of chipotle chilies, and of course anything with cilantro in it gets my vote too. With the full amount of chilies called for, it's a fairly spicy dip, but the coolness of the sour cream helps to temper it.

Chipolte Dip

Chipotle Dip
3-4 canned chipotle chilies in adobo sauce
1 tsp adobo sauce
2 scallions, diced
1 clove garlic, minced
1 tsp fresh cilantro, minced
1/4 c monterey jack cheese
1/2 c mayonaise
1 c sour cream
1 tsp lime juice
1/4 tsp cumin
Salt/pepper to taste

Puree chipoltes in 1 tsp of adobo sauce. Place into medium sized bowl, and add the remaining ingredients. Stir well and allow to chill in the refrigerator for a few hours. Serve with fresh crudite or chips.

Monday, July 03, 2006

Pineapple Cucumber Gazpacho

Nothing says "Summer's Here!" to me like a bowl of fresh gazpacho. I normally make this version a few times each summer, and it just makes me happy. I'm not sure if it's the bright pineapple flavor paired with the cilantro and cucumber, or the festive color of it, but either way, it's perfect.

Pineapple Gazpacho

Pineapple Cucumber Gazpacho
3 c fresh pineapple, cored and diced
3 c cucumber, peeled and diced
3/4 fresh pineapple juice
1 green onion, chopped
1 tsp lime juice
1 small jalapeno pepper, seeded and minced
1 handful fresh cilantro
Salt and pepper to taste

Place 2 cups of fresh pineapple and cucumber in blender, along with pineapple juice, onion, lime juice, and jalapeno. Blend until smooth. Add fresh cilantro and remaining pineapple and cucumber and pulse. Gazpacho should remain chunky. Season to taste with salt and pepper.

Wednesday, June 28, 2006

Rosemary Shortbread

There's nothing quite like the taste of shortbread. And shortbread is one of those things that holds a fond memory for me. Every time we would travel overseas when I was younger, and we'd have any kind of layover in England or Scotland, my father would rush to the nearest little airport store and buy multiple packages of Walkers Scottish Shortbread. Even now, when I see that familiar red package, I get that old nostalgic feeling.

In this month's Herb Quarterly magazine, there was a lovely recipe for Rosemary Shortbread. I immediately bookmarked it as a "make soon" recipe. Rosemary gives the shortbread a lovely flavor, although I'm sure you could substitute any other fresh herbs you have on hand.

Rosemary Shortbread

Rosemary Shortbread
1 c flour
1/4 c plus 1 1/2 tsp sugar
1/8 tsp salt
1 tsp fresh rosemary, finely chopped
1 stick (1/2 c) unsalted butter, softened

Preheat oven to 350. Sift flour, 1/4 c sugar, and salt into a medium bowl. Stir in rosemary. Add the butter and stir with a fork, or use your fingers to make a soft dough. Divide the dough in half and pat into 2 thin 6" discs on a parchment-lined baking sheet. Cut each disc into 8 wedges. Prick each wedge with a fork, and sprinkle the remaining sugar over the dough. Bake the shortbread until lightly golden, about 20 minutes. Re-cut the wedges after removing from the oven, and cool completely on a baking rack.

Tuesday, June 27, 2006

Smoky Sage Lentil Soup

I'm a huge fan of lentils. Not only are lentils very tasty, but they are also extremely healthy for you, being very high in dietary fiber, protein, iron, and folate.

On one of the vegetarian email groups I belong to, someone posted a recipe for a Lentil Sage Soup. Since sage is one of my favorite herbs to cook with, I knew right away this would be a fantastic recipe. This is my variation on it, and I've made a few slight changes. The liquid smoke added at the end gives a wonderful flavor to this rich soup, and complements the fresh sage perfectly.

*This is also my entry into this week's Antioxidant Rich Food Round up over at Sweetnick's Place*

Smoky Sage Lentil Soup

Smoky Sage Lentil Soup
2 tbsp olive oil
1 1/2 c chopped vidalia onion
1 c chopped celery
1 c chopped carrots
3 cloves garlic
1/4 c fresh sage leaves, minced
2 (14.5 oz) cans vegetable broth
4 c water
1 (28 oz) can crushed tomatoes
1 (8 oz) can tomato sauce
1 (16 oz) bag lentils, washed
1 bay leaf
2 1/2 tsp italian seasoning
1/2 tsp salt
1/2 tsp pepper
1/4 tsp liquid smoke

Heat olive oil in a large saucepan over medium high heat. Add onion, celery, and carrots, and saute 3-5 minutes. Add minced garlic and sage, and saute an additional 2 minutes. Add remaining ingredients, and bring to a boil. Lower heat, cover, and simmer for 45 minutes to an hour, until lentils are tender. Stir in liquid smoke and remove from heat. Serve with a thick crusty bread.

Monday, June 26, 2006

Peppered Parmesan Thins

I love making crackers and flatbreads almost as much as I like making dips and spreads. Like my polenta crackers, these are exceptionally easy to make and take about 25 minutes in total. They can also be taken in a thousand different directions - add fresh or dried herbs, or try a different cheese. No matter how you make them, they're delicious!

(As a sidenote, I'm a huge peppercorn fan, so those who are sensitive to it might want to use the lesser amount)

Peppered Parmesan Thins

Peppered Parmesan Thins
1/2 c white flour
3 tbsp butter
1 egg yolk (or egg substitute)
1/2-1 tsp freshly cracked peppercorns
2/3 c freshly grated parmesan cheese
pinch of ground mustard powder
pinch of salt

Place flour in a medium sized bowl. With 2 forks or a pastry blender, cut in butter until it resembles coarse crumbs. Add remaining ingredients, and combine well. Roll dough into a log and wrap tightly in plastic wrap. Allow to chill in the refrigerator for 10 minutes. Preheat oven to 400. Remove dough from refrigerator and slice dough 1/4" thick. Place on ungreased cookie sheets and slide into oven. Bake 10 minutes, until starting to brown. Cool and serve!

Thursday, June 22, 2006

Dukkah

I come from a family that has always loved to travel. As long as I can remember, the trips usually end with a trip to the local grocery store or market to get the three staple souvenirs - coffee, dark chocolate, and spices.

Dukkah is an Egyptian spice blend that I was introduced to, oddly enough, in Bulgaria. On one of the shopping trips to the market, I handed over a fistful of cash and walked away with some bottles of spices. This was one of them, and although it's been long gone from my spice rack, I've always wanted to try and recreate my own.

The heady aroma of the spice blend as it is crushed will absolutely stun you. The freshly toasted coriander, fennel, and cumin seeds, along with the toasted hazelnuts and pine nuts is a winning combination that's also extremely versatile. Dukkah is normally served with fresh bread and with a bowl of olive oil. After dipping the bread into the oil, you then dip it into the spices, and enjoy. Although that is the common method of serving, it would be excellent on any number of things - sprinkle on vegetables or rice, spread over pita bread with olive oil and bake, dip hardboiled eggs into it, or use it as a seasoning blend for the Microtato Chips. No matter how it's used, it will be thoroughly enjoyable.

dukkah

Dukkha
1 c hazelnuts
1 c pine nuts
1 tbsp fennel seed
1 tbsp cumin seed
1 tbsp coriander seed
1/2 tsp peppercorn
2 tbsp toasted sesame seeds
1 1/2 tsp crushed red pepper
1/2 tsp dried thyme
1/4 tsp sea salt

In a dry pan over moderately high heat, toast hazelnuts and pine nuts until nicely browned, 4-5 minutes. Remove from pan, and cool. Add fennel, cumin, and coriander to pan, and toast 2-3 minutes. Place in mortar and pestle, and grind. Place in a bowl. Crack peppercorn with mortar and pestle, and add to bowl. Pulse nuts to a coarse grind in a food processor. Do not overprocess! Add to bowl, along with remaining ingredients. Stir well to combine. Store in an airtight container.