I've had edamame a few times in the past, but I didn't fall in love with it until I had it at
Nectar (which is an exceptional restaurant, and is amazingly close to the restaurant I've always dreamed of opening). They do a simple quick stir in a wok and serve it with some delicious sauces. After tasting it there, I immediately came home and tried to recreate it. I've gotten pretty close, and I often like to whip it up* for a quick and fairly healthy snack.
But this morning, as I was flipping through this month's current issue of Gourmet, I saw a recipe for edamame that I just knew I needed to try. The following is my variation, and includes one of my new favorite things,
chili garlic sauce. This is a relatively simple recipe to whip up, and would make a fabulous appetizer.
As an aside, please bear with me as I learn the techniques and settings on the new camera.
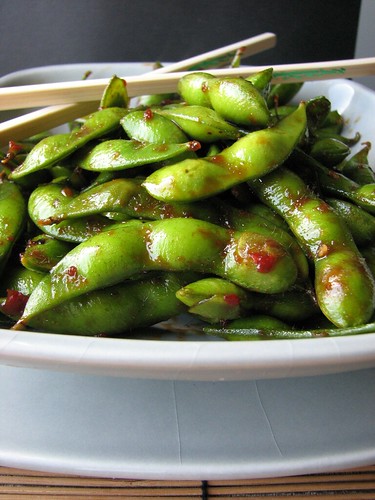 Chili Garlic Edamame
1 lb frozen edamame, in pods
2 tbsp soy sauce
2 tsp oyster sauce
1 tsp sesame oil
1 1/2 tsp
chili garlic sauce
2 tsp vegetable oil
1 tsp minced ginger
Steam edamame in microwave until slightly warm and not frozen. (You can do this one of 2 ways - I have a microwave steamer that I use, or even easier is throwing the edamame in a ziploc bag with about a tbsp of water, sealing it, leaving a small opening for steam, and heating it on high for 2 minutes) Drain and set aside. In a small bowl, combine soy sauce, oyster sauce, sesame oil, and chili garlic sauce. Heat a large wok over high heat. Add oil, and saute ginger for 15 seconds. Add edamame and stirfry for 1 minute. Add sauce, and stirring frequently, cook for an additional 1-2 inutes, or until most of the liquid has evaporated. Remove from heat, place in serving dish, and enjoy!
*This is the easiest way to make tasty edamame - steam in microwave as above. Heat 1 tsp of sesame oil in wok over high heat. Add edamame, season with Adobo or any other salt seasoning blend, and stirfry for 1-2 minutes, until heated through.


