Monday, October 30, 2017

Elderberry Syrup

As I mentioned in my last post, we are huge fans of elderberry syrup around here. Elderberry syrup is great for cold/flu prevention, as well as helping to kick a cold to the curb if you already have one. We use the Elderberry brandy for ourselves after we get home from work, but this syrup is great for during the work day , and perfectly safe for kids.


We've purchased elderberry syrup at the store, but it's so expensive - especially when you have 3 people taking it, so I started making my own. And it's insanely cheaper. For example, I can buy a bottle of Elderberry syrup for about $12 at my local natural foods store. Conversely, I can make a batch four times that size for about $6 in ingredients. So it's a no brainer to make our own. Plus, it only takes about 90 minutes to make a 4 cup batch.

  (Mommy, can you put my truck in your picture??)

I start out with 1 cup of dried elderberries (Amazon is a great place to get them) and put those in a pan with 4 cups of water. I add 2 cinnamon sticks, 1 star anise, 6-7 whole cloves, and then 1/4 cup dried echinacea.


Bring to a boil after stirring well, then lower to a simmer. Cook for about 45 minutes to an hour. Strain out the spent herbs and berries with a fine strainer, and use the back of a spatula to smash any extra syrup out of them.


Then I add 3/4 cup to 1 cup raw honey. Raw honey is so good for you and is loaded with all sorts of antibacterial properties. I'm slightly obsessed with local raw honey. Each variation (wildflower, orange blossom) has it's own taste. I found a Sweet Clover Wildflower honey at my local store and it's my new obsession. The taste is unreal.


 Anyway, I digress.Once your syrup has cooled to room temperature, add up to 1 cup honey. The herby taste is a little strong due to the echinacea, so if you have kids who are sensitive, I'd use the full cup. I started there with ours, and have now decreased it down to 3/4 cup and my son doesn't even know the difference.

Then store in a jar in the fridge. I know many who keep theirs in the pantry, and quite frankly, you could, but I like to be safe rather than sorry and keep mine in the fridge. For dosage, I give my son about 5ml (about 1 tsp) once per day as preventative medicine (although it's good to give your body a break every now and then, so we only take it for a week or so before taking a day off) or 5ml twice per day if he's fighting a cold. For adults, I recommend 15ml (about a tbsp) in the same frequencies.

Oh label maker - how I love thee!

And as always, I'm not a medical professional, so please check with your health guru prior to use.


Friday, October 20, 2017

Elderberry Immunity Brandy

Hey ya'll!

It's me! Those of you who follow me on Instagram know I'm alive and well, as I post pretty frequently over there. But I haven't given the blog any love in a long time, so I've been thinking of what I wanted to post.

Some of the most frequent questions I get through Instagram are about the herbal medicines we use in the home to promote health and wellness, so I thought I'd start with a series of posts, featuring our most favorite and most used herbal recipes. I'm a huge fan of herbal medicine, and we use them quite frequently in our home. And as cold and flu season has already started around here, it was time to restock our herbal remedy cabinet. Today we're starting out with Elderberry Immunity Brandy, which is great for treating adult colds and flu, and over the next few weeks, I'll have posts with recipes for Fire Cider, Elderberry Syrup for kids, Garlic Infused Honey, and some other things. (UPDATE - here's the link for the kid-friendly version!)

And follow me over on Instagram to keep up to date with posts and new recipes too!

Elderberries are amazing for the immune system and have been used to prevent and treat colds and flus for many years. They are naturally high in immune-boosting compounds. They have also been proven to shorten the duration of a cold if you already have one. Two weeks ago, my son got sick, and then I got sick, and then my husband (as these things go) and we were able to kick it within 24-48 hours using our elderberry syrup, fire cider, and some other homeopathic things. Elderberry syrup is available in most stores, but it can be somewhat pricey, so I like to make my own. I make a different syrup (one without brandy) for the boy and I'll have that recipe next week.


I like to boost up the elderberry brandy by adding in echinacea, which is another great immune booster. Echinacea encourages the immune system and reduces many symptoms of colds, flu, as well as some other infections and illnesses. And rosehips are a source of vitamin C, aid in absorption, plus they taste really good, so I like to add them in as well.


I happen to have really good Amish stores around me that sell all of these things in bulk, but if you can't find them locally, Amazon has them, as well as Mountain Rose Herbs, which is a fantastic place for great, solid herbal products.

In a pint jar, add 3/4 cup dried elderberries, 1 heaping tbsp of dried echinacea and 1 heaping tbsp of dried rosehips.


I also add 1/4 cup to 1/2 cup raw honey. We like ours on the less sweet side, but the brandy can be powerful, so if you're sensitive, I'd add the full 1/2 cup. It will be much more syrupy. And look at this delicious raw honey. It's thick and creamy and just delicious. Plus, raw honey is loaded with all sorts of antibacterial and anti-fungal properties.


Fill the jar up with brandy. Cheap is fine. I usually pick up a large handle of whatever's on sale, as we use it a lot for tinctures and other herbal things.

Cap the jar and place it into a dark space for 4 to 6 weeks, shaking every few days or so. Strain it, using a coffee filter or cheesecloth placed into a strainer. For dosage, we usually take about 20ml (or one tablespoon) 2-3 times per day when we already have a cold, or one dose per day during cold season. Since it is brandy, I wouldn't recommend taking it before work, unless that's how you roll.


And here's a recipe for a kid-friendly version!

And standard disclaimer: I am not a licensed medical professional, so make sure to consult with your own medical gurus prior to use. 

Sunday, July 31, 2016

Roasted Tomato Basil Soup for Canning

If you've been following me on Instagram (and please do, because I update that FAR more frequently than this old blog), you know that I have been can jamming like it's my part time J.O.B. My husband has been blessed to have a summer job at our local CSA, and one of those perks is getting to bring home a ton of vegetables. I've wanted to make the most of all of the amazing bounty, so I've been trying to preserve and can things at least every other day so nothing goes to waste. What he brings home, plus our own garden has given us an incredible amount of food, which will be incredible to have on hand for the rest of the year. Between canning, dehydrating, and freezing, we've been quite busy stocking up our pantry. (and I just took a count - so far, I've canned about 200 pints of things)

Although we've gotten some tomatoes from his job, and we have a few plants in our garden, I knew I needed more to be able to preserve all the tomato based things I had on my wish list (more spicy Bloody Mary Mix, salsa, tomato vodka sauce, and then some plain tomato things). While driving through the country side yesterday, I found a little Amish place selling 25 pounds of tomatoes for $6 a box. So I did what any good canner does and picked up 4 boxes. Yeah, I'm aware that's 100 pounds of tomatoes...


We added a pressure canner this year, and I couldn't be more happy. Although it's still a little scary to use, it's no different than a pressure canner. And as long as you follow the directions, you should be good to go.

This recipe is pressure canned, although I don't see why you couldn't freeze this if you wanted to. There is probably a way to water bath can it too, but if you aren't a canning expert, I probably wouldn't try monkeying around with it as apparently, botulism is no joke.

This recipe is from the new Big Ball Book of Canning, although I tripled the recipe and then added some spices to it, so here is my version. This yielded 14 quarts, and you could easily do this in pints if you liked a smaller serving size.


Roasted Tomato Basil Soup
24 pounds tomatoes, quartered, cored, and seeded
12 cloves garlic
3 tbsp. olive oil
6 cups minced onion
3 cups dry white wine
12 cups vegetable or chicken stock
3 tbsp salt, or to taste
2 tsp white pepper
1 tsp ground coriander
1/4 cup Worcestershire sauce
1/2 cup red wine vinegar
1 (18 oz) can tomato paste (optional - I used it because my soup was a little thin)
3 cups packed basil leaves, minced

Preheat oven to 375. Quarter, core, and seed tomatoes, and place cut side up on large rimmed baking sheets. Add cloves of garlic and tuck down in between tomatoes. Place in oven and bake 45 minutes to an hour, until garlic and tomatoes are nice and soft.

Meanwhile, heat olive oil in large stock pot. Add onion and saute, 8-10 minutes, until soft and tender. Add wine, and cook, uncovered, 10 minutes, stirring frequently. Add tomatoes, stock, seasonings, and tomato paste, if using. Bring to a boil and cook 20 minutes, or until heated through. Using a stick blender (or do in batches in a traditional blender), process soup until nice and smooth. Return to pot and add basil. Stir well.

Ladle hot soup into hot jars, leaving a 1" headspace. Remove any air bubbles. Wipe jar rim and apply lids, fingertip tight. Place jar on rack in pressure canner, containing recommended amount of simmering water. Place lid on canner and turn to locked position. Adjust heat to medium high. Vent steam for 10 minutes. Place the counter weight on vent; bring pressure to 10 pounds. Process pint jars for 50 minutes and quart jars for 60 minutes. Turn off heat; cool canner to zero pressure. Let stand 5 more minutes before removing lid. Cool jars in canner 10 minutes. Remove jars and cool.

Monday, March 21, 2016

Sweet Onion Jam and Diet Changes

Well hello there!

Spring weather is almost upon us and I can hardly stand it. This is my favorite time of year - when the sun is out more often, the days get longer, and the weather starts to get warmer. It's also when we finalize our garden plan, which I love to do. I could spend hours pouring over seed catalogs and refiguring our garden layout and planting plans. I guess that makes me a bit of a nerd, but it's all worth it late summer when we're overloaded with fresh fruits and vegetables.


Saint Patrick's Day just passed us, and since I am now Irish by marriage, I like to try and make something special each year for my husband. Usually it's shepherd's pie (his favorite), but this year I decided to switch it up. I've never actually had corned beef or pastrami, but I thought this seemed like the year to try. Wait, whaaatt?!? 28 Cooks, the vegaquarian blogger is talking about eating meat?

I guess I should back up just a bit. Most of my friends and family know this by now, but yes, it's true. I've introduced some meat back into my diet. See, I had been a vegetarian for about 12 years. I started when I was 25 after realizing how horrible my diet was and figuring that if I spent 30 days eating just vegetables, I'd eat better. 30 days turned into 12 years and I really enjoyed it. That being said, I can't deny I had some issues with it as far as getting enough protein and iron. Since I became a vegetarian, I've been anemic and had very low iron. My doctor would admonish me every year to try and supplement with more iron, but no matter how much iron rich vegetables I ate or iron supplement I tried, it just stayed low. And it wasn't really a big deal overall and I just dealt with it. Sure, I was cold often and my fingers and feet were always freezing, but I wasn't ready to give up being a vegetarian.

And then I got pregnant with my son. And somewhere within my 3rd trimester, my iron became dangerously low. Because of it, I had some cardiac issues and ended up seeing a hematologist. We started some serious iron supplementation for a few weeks to see if I could get back to a better level. But several weeks of taking pills multiple times a day had little effect. He made it very clear to me that I was looking at blood transfusions, unless I did something else. And although I wasn't crazy about it, I decided that a steak sounded like a much less invasive option than all that comes with transfusions. I cried a bit over the decision, but then promptly called my dad (aka. The Grillmaster) and asked him to make me my first steak.

Now this is where I should say as a former vegetarian that it was horrible and I choked it down. But I didn't. It was actually on the tasty side. And after a few weeks of adding grassfed meat into my diet, I felt better and my lab levels were much better. I was able to stop my cardiac monitoring and the huge doses of iron I was on. It definitely wasn't an easy decision to make, but honestly my body felt so much better. And quite frankly, I would have eaten anything if it was better for my growing baby.

And so now, we still eat meat occasionally. I still miss being a vegetarian and we mostly eat vegetarian at home, except for adding in meat a few times a week. And we do our best to only eat local, organic, and grass fed meat as much as possible.

Now back to our Saint Patrick's day feast - I decided this year to try something different, and decided to make pastrami. We don't have a smoker, but I found this awesome recipe. It turned out incredibly amazing. I also made a loaf of Jewish Onion Rye (recipe to come later this week) but it needed something else to spice it up. Enter the onion jam.


I know it sounds weird, but the flavors of this jam are absolutely incredible. It's slightly sweet, yet has a lovely savory flavor from the onions and red wine. It goes great with the pastrami, but is tasty enough to use in other dishes. I used it in the middle of a grilled cheese for my almost 2-year old (which he loved) and also with a chicken salad sandwich. I'm sure there are a hundred other uses and I can't wait to make another batch.


It's very easy to make and most of the cooking time is just making sure to stir it every once in a while. So go ahead and give it a try - make sure you let me know how it turned out!

Sweet Onion Jam
Makes 2 cups

1 tbsp. unsalted butter
2 1/2 cups diced onions
1/2 cup sugar
1/3 cup dry red wine
1/3 cup red wine vinegar
1/3 cup grenadine
1/4 tsp cracked mustard seed
1/4 tsp celery seed
pinch of salt

Melt butter in a medium skillet. Add the onions and a pinch of salt and cook over medium high heat until soft and just translucent, about 10 minutes. Add the remaining ingredients and lower heat. Leave uncovered and cook 30-40 minutes, stirring every few minutes, until the liquid has thickened and coats the back of the spoon. Transfer to a bowl and let cool before using.

Tuesday, November 17, 2015

Multi-grain Sandwich Bread, easy enough for beginners

Frequent readers of Home by 28 Cooks know that we are a bread lovin' family. I know, I know - gluten is evil. But gluten is also tasty. And it also happens to be one of the things that my newly-picky-and-exercising-his-independence-to-say-no-to-things-even-when-he-likes-them is one thing my 16-month old hasn't refused. Yet.

I've talked to quite a few people who are scared of bread baking. The multiple steps and rising and all of that mumbo jumbo leaves them afraid to try. And although I must admit baking fresh bread does take some extra time and care, most of it is inactive. And seriously, the result? Amazing.


This has become our new standard weekly bread recipe to make. It produces such a wonderful hearty loaf, chock full of whole grains. And seriously, it's easy. Very very easy.


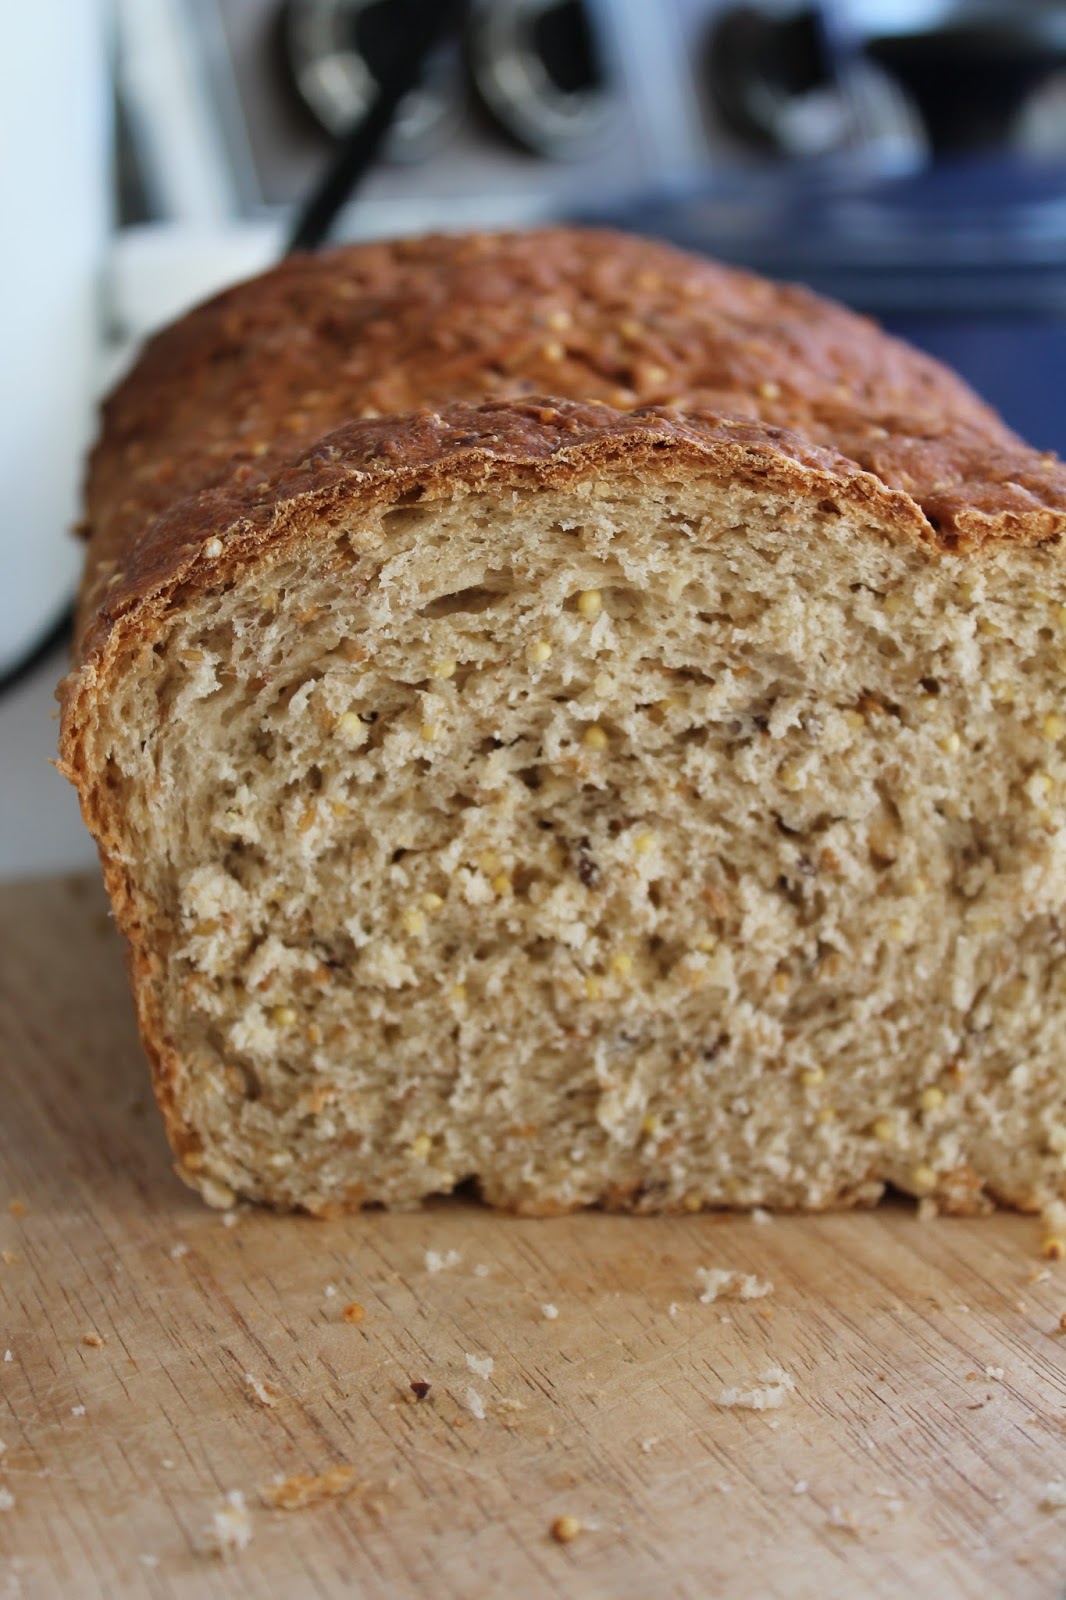
I mean, look at it. Doesn't that look tasty? So if you've been hesitant to try baking bread, I urge you to give this one a try. And if you do, let me know how it turns out!

I do usually double the recipe (like I said, bread family y'all) and I've included the measurements for that down below. We use organic unbleached all purpose flour for ours, but you could also use half whole wheat or even bread flour if you want.


Enjoy!

Multi-grain Sandwich Bread
Makes 1 8x4 or 9x5 loaf
Time: about 4-5 hours, plus another 1-2 hours to cool the loaf

1/4 cup millet
1/4 cup whole wheat couscous (or regular)
1/4 cup steel cut oats
2 tablespoons olive oil (or butter)
2 tablespoons honey (or molasses for a darker loaf)
1 1/2 cups boiling water

2 tsp active dry yeast or 1 1/2 tsp instant yeast
1/4 cup flaxseeds
1 3/4 tsp salt
2 1/4 cup organic all purpose flour

Add millet, couscous, oats, olive oil, and honey to a large glass bowl and stir in boiling water. Allow to cool 15-20 minutes, until temperature of water is about 100 degrees. (or whatever temperature your yeast prefers - check the package for exact temps)

Stir in yeast, then flax seeds, salt, and 1/2 cup flour. Add remaining flour, 1/4 cup at a time, stirring after each addition. (I usually start to use my hands to mix it after about 1 1/4 cup). Scrape down sides of the bowl and cover with plastic wrap. Let mixture sit for 20 minutes. This allows the starches in the flour to absorb the water, which makes the dough smoother and easier to knead. It also allows you to add less flour, which makes a lighter loaf of bread. Fancy bread bakers call this process autolyse.

Uncover the bowl and scrape dough out onto a lightly floured surface. Knead the dough about 7-8 minutes, adding light sprinkles of flour if it starts to stick. You do want the dough to be somewhat tacky when finished.

Round the dough into a ball and place into a large bowl coated with oil. Roll the ball of dough around the bowl a bit to get a light coating of oil on it. Cover the bowl loosely with plastic wrap and leave to rise until doubled, about an hour and a half. (For me, the perfect place is in my oven. I have an electric stove, so I will heat it at 400 degrees for 1 minute, and then turn off. I place the dough in and shut the door and it rises perfectly in there. Gas ovens are typically warm enough without preheating)

Grease your loaf pan with oil. Turn the dough out onto a surface very lightly dusted with flour. Pat into a rectangle, as long as your loaf pan and twice as wide. Roll the dough up snugly, cinnamon bun style, and pinch the seam shut. Tuck the ends under the loaf and roll it a few times, seam side down, to smooth it out. Place the log, seam side down, into the loaf pan. Place the entire pan into a large plastic bag (we use those plastic grocery bags) and tie the bag shut, leaving it inflated to give bread room to expand.

Let the loaf rise until doubled in bulk and 2" above the rim of the loaf pan, which usually takes about 45-60 minutes.

Place a metal or cast iron pan that you don't care about on the floor of the oven or on the lowest rack. Preheat oven to 400 degrees.

Remove the bag from the loaf pan. Fill a 1/2 cup measuring cup with ice cubes. Open the oven and quickly but gently place the loaf pan inside. Toss the ice cubes into the pan on bottom of the oven. Close the door and don't open it for 20 minutes. After 20 minutes, reduce the oven to 350 degrees. Rotate the pan and bake for another 30-40 minutes. A thermometer inserted into the loaf should read 195-200.

Remove the loaf from the pan and let cool completely before cutting (the internal steam continues to cook the bread as it cools).

To double the recipe, double all ingredients, except for yeast. Use 3 tsp active dry yeast or 2 1/2 tsp instant yeast. The rest of the instructions remain the same. 

Monday, November 09, 2015

Acorn Squash stuffed with Wild Rice, Apples, and Toasted Pine Nuts

Well hello to you! Yep, it's been a long time but I'm back. Now that my kitchen helper is almost 16 months old, he loves to supervise in the kitchen from his high chair. And that means more time for me to cook and develope recipes!

Not to say I haven't been cooking the past few months, but since his attention span was so short, I was opting for quick and easy meals that I could throw together in a few minutes. The old pressure cooker and crock pot have really come in clutch the past few months.

Today I'm back with a recipe. I've actually never cooked acorn squash before, but was inspired by a friend's Instagram photo (hey Eva!) to try. And wow - was I impressed and surprised at how easy it was. Not only is it pretty quick to put together, but the flavor of the squash itself is sweet and savory, which lends itself to a wide variety of fillings.


Although I've opted for a vegan filling for this recipe, you could easily throw some sausage in yours, or amp up the crispy panko topping with parmesan. You could also toss in some dried cranberries or golden raisins for a little sweet snap of flavor!

The recipe couldn't be simpler. I halved and scooped out the seeds of 2 acorn squash, and then drizzled them with melted butter, a little sprinkle of brown sugar, and salt and pepper. They roast in the oven for about 20 minutes.


Then for the filling, I started with a lovely wild rice mixture and added some fresh apples and toasted pine nuts. If you don't have pine nuts, try toasted pecans. Either nut will add a delightful little crunch to the recipe. Topped off with panko bread crumbs, they were put back into the oven to toast the tops and bring the flavors all together. At the end, you have a delicious and savory dish that looks incredible! This would be a wonderful side dish for the upcoming holidays.


Any other tried and true ways you like to cook your acorn squash??

Acorn Squash stuffed with Wild Rice, Apples, and Toasted Pine Nuts
Serves 3-4

2 acorn squash
1 tbsp melted butter
1 tsp brown sugar (optional)
Salt/pepper
2 tbsp olive oil
1/4 cup chopped onion
2 cloves garlic, minced
1 1/2 cups cooked wild rice (or brown rice)
1 tbsp coconut aminos (or Bragg's)
1/2 tsp dried thyme leaves
1/2 tsp smoked paprika (or regular paprika)
1 tsp no-salt seasoning blend (I used Trader Joes 21 Seasoning Salute)
1/4-1/2 tsp salt (to taste)
1/4 tsp celery seed
1/4 tsp poultry seasoning
1/2 cup diced apple
2 tbsp toasted pine nuts (or pecans or walnuts, diced)
1/2 cup seasoned panko bread crumbs
2 tbsp melted butter

Preheat oven to 450. Cut squash in half, scoop out seeds, and drizzle with melted butter. Sprinkle with brown sugar and season with salt and pepper. Place in oven and bake until just fork tender, about 25 minutes. 

Meanwhile, heat up olive oil in medium sized pan. Saute onion 4-5 minutes, until becoming soft and opaque. Add in garlic and saute another minute or two. Remove from heat and stir in rice, aminos, seasonings, apples, and nuts. Stir well to combine. 

In a small bowl, combine butter and panko crumbs Set aside. 

Remove squash from oven. Fill each piece with rice filling and top with panko crumbs. Place back into the oven and bake another 20-25 minutes, until top is toasted brown and filling in heated through. 

Serve and enjoy!!


Saturday, July 18, 2015

It's Zucchini Season, Y'all!

So zucchini is starting to overwhelm local gardeners, so I thought I'd post a few recipes that are great for using up some of that fresh produce. I just made 2 of these recipes myself in the past week, and am sure I'll be using the rest shortly.

Although this original recipe for Indian Fritters was made with eggplant, I tried these using some fresh zucchini and they were amazing!

Indian Eggplant Fritters

This Cilantro Zucchini Hummus is one of my favorite recipes for zucchini of all times. I just made a huge batch of this and have been using it to dip carrots into or to toss with fresh salad greens.

Cilantro Zucchini Hummus

Want a quick AND easy dinner? You can have this Summer Vegetable Cacciatore on the table in under 25 minutes. You can't beat that!

Vegetable Cacciatore I

This oldie-but-goodie recipe is quick, easy, and tasty. I made this Curried Zucchini Soup a few weeks ago and it was the perfect meal.

Curried Zucchini Soup

Thursday, July 16, 2015

Roasted Poblano and Summer Squash Soup

Summer seems like an odd time to be eating soup, doesn't it? Yet for some reason, this week, I've been craving it. But even if you're not up to a hot bowl of something when it's hot outside, summer is a great time to make a soup and freeze for cooler times.

I know I'm not alone in having an overwhelming abundance in summer squash and zucchini. This year, I'm determined to use up every single one in a new way. So far, it's been going great. We've made Bread and Butter pickles with squash, and they are exceptional! I'll be posting a recipe later this week.

Our pepper plants also seem to be working overtime, and I just picked some lovely poblano peppers this morning that I wanted to use up. You can't go wrong roasting vegetables for soup, so I decided to throw some zucchini and poblanos in the oven and then make a soup. I also threw in a red onion and some garlic, because why not?


Here it is after roasting in the oven, in all of it's roasted gloriousness.


After roasting, the rest of the soup couldn't be easier. Simply add water or stock, a few spices, and blend it all up in a blender or with an immersion blender. And viola! You've got yourself a bowl of warm summery goodness.

This soup also freezes extremely well, so make a double or triple batch and put some away for the winter.

What are you doing with your zucchini abundance? And if you need some more zucchini recipes, check back tomorrow for some ideas!


Roasted Poblano and Summer Squash Soup
 
3 large summer squash, seeded and roughly chopped into 2-3" pieces
2 poblanos, seeded and cut into eights
3 cloves garlic
1 medium red onion, quartered
2-3 tbsp. olive oil
1/2 tsp salt
Pepper
4 cups water (or stock)
1/2 tsp cumin
1/2 tsp garam masala
1/2 tsp white wine vinegar
salt to taste
 
Heat oven to 425. Place squash, poblanos, garlic, and red onion in 13x9 baking pan and drizzle with olive oil, salt and pepper. Toss well and place into oven. Roast 30-45 minutes until vegetables are soft and browned. Place into a large soup pan over medium heat. Add remaining ingredients and blend with an immersion blender. Serve and enjoy!

Tuesday, June 23, 2015

Sourdough Focaccia


Those that know me are aware of my passion for bread baking. The entire process just makes me happy. And earlier this year, I resolved to conquer my fear of sourdough. At some point in the past, I tried the "DIY sourdough starter" and it didn't work and ended up getting pretty gross. A few months ago, I found a starter in one of my favorite health food stores, so I thought I'd try it again. And it's been wonderful.


We lovingly refer to the starter as "Hank," because, well, everything in our house gets nicknames. So we'll talk about feeding Hank and making sure Hank has had dinner and well...Hank has really become part of the family.

Here's his home on top of my fridge.


Anyway, so Hank has been maturing and has the most delightful "sourdough" smell to him and makes the best breads. I've tried him in baguettes and multigrain sandwich bread and pancakes and there's still so many things I want to try.

But one of my favorites is sourdough focaccia. This recipe is definitely a staple around here and we make it.....let's just say we make it rather frequently. But it's easy and you can top it in so many ways. Today's variety was just Italian seasoning, garlic powder, cracked pepper and coarse sea salt.


Or we've done kalamata olives and thinly sliced onion. Or my favorite combination - raisin and rosemary. Seriously it's crazy delicious. But what I love about the recipe is it's relatively simple. You mix it all up, knead it for a few minutes, let it rise twice, and then it's ready to go.

There are so many great primers out there for sourdough, so I won't go into the nitty gritty, but suffice it to say it's so much easier than I thought and it really doesn't require a lot of extra work. I keep Hank out on top of my fridge because I use starter almost every day (between baking and giving it to friends) but you can easily keep it in the fridge and only feed it once a week. Very very easy. So give sourdough a try. It's so worth the effort.

And if you live close, you're welcome to stop by and get a little Hank Jr. to take home.

Sourdough Focaccia

1 cup sourdough starter, fed or unfed
3/4 cup warm water
2 tsp instant yeast
3 cups flour
1 1/2 tsp salt
3 tbsp. olive oil

Topping
1-2 tbsp. olive oil
Italian seasoning, garlic powder, coarse sea salt, pepper, etc
kalamata olives, onions, etc

Combine all dough ingredients in a large bowl. Mix together well and knead for 5-7 minutes until dough is smooth. Place in a lightly greased bowl and let rise for at least an hour. Punch down, then let rise again for at least another hour.

Lightly grease a 9x13 baking pan or cookie sheet and pat or roll dough into a long rectangle in the pan. Brush the olive oil over the dough and sprinkle with herbs and desired toppings. Loosely cover with plastic wrap and let rise for 20 minutes.

Meanwhile, preheat oven to 425. Remove plastic wrap and bake for 15-20 minutes, until golden brown. Remove from pan and slice when warm.

Wednesday, June 03, 2015

Clean-Out-The-Fridge Crockpot Curry

Around these parts, we like to do Pantry Week every once in awhile, which is a great opportunity to use up some of those items that seem to languish forever in the fridge and pantry. It's also a great time to clean out any of those just-about-to-turn vegetables that seem to lurk in the corners.

This recipe is perfect for Pantry Week and Clean Out The Fridge days. You can use pretty much any vegetable that you want, and the rest is just spices and items that you probably have in your pantry already. And it spends a few hours simmering in the crockpot after only a few minutes of throwing everything together, so it comes in clutch for those days you don't have much time.


I used a potato, onion, some carrots, and a zucchini, but you could easily use mushrooms, sweet potatoes, celery, green peppers, or whatever else you want. A can of garbanzos was thrown in, but feel free to use black beans, navy beans, or cannellini beans if you want. I've even thrown in a cup of uncooked red lentils, which cook up beautifully. Seriously - don't overthink it. Just chop up your vegetables, mix in the rest of the ingredients, and let it simmer for 6-7 hours.

It's deliciously warm and comforting with just the amount of spice. We had it over green bamboo rice that's been eyeballing me from the corner of the pantry for an embarrassingly long time, but you could easily use quinoa, your favorite rice, or any other grain that makes you happy.

So go ahead, clean out that pantry and fridge and give this recipe a try!


Clean Out The Fridge Crockpot Curry

1 potato, chopped
1 medium onion, chopped
1 zucchini, chopped
2 large handfuls of baby carrots, chopped
1 can chickpeas, drained and rinsed
4 cloves garlic, minced
1 (15oz) can tomato sauce
1 cup vegetable broth
1 tsp garam masala
1 tsp ground coriander
1 tsp cumin
1 tsp smoked paprika
1/2 tsp yellow mustard seed
1/2 tsp turmeric
1/2 tsp ginger
1/4 tsp celery seed
1/4 tsp (or more) cayenne
Salt/pepper to taste

Combine all ingredients in crockpot and simmer on low for 6-7 hours, until vegetables are tender.

Looking for more Pantry Week recipes? Try these!
Spicy Zucchini and Mushroom Saute
Grilled Enchilada Pizza
No Knead Bread
Roasted Eggplant and Tomato Bisque


Monday, June 01, 2015

A Garden Update

Can't believe how fast time is flying. Here it is - already the first day of June. In just a little over a month, the baby will be a year old. How did that happen so fast?!?

We've been so busy working on a project which we'll be sharing later on our blog, but for now, I thought we'd do a little update of what our garden looks like right now. I apologize in advance for the picture heavy post.

We'll start with fruit. Our black raspberry bushes have EXPLODED in our yard, which is fine by us! We planted 2, just 2, small plants 2 years ago. Last year, we picked 9 QUARTS from those bushes. This year, we will far far outdo that total.


They should be ready in a few weeks, and I can't wait.


We also added a potted blueberry bush this year. We don't have any real space to devote to any more fruit, so we've started adding some things in containers. This tiny bush has a surprising amount of fruit on it!


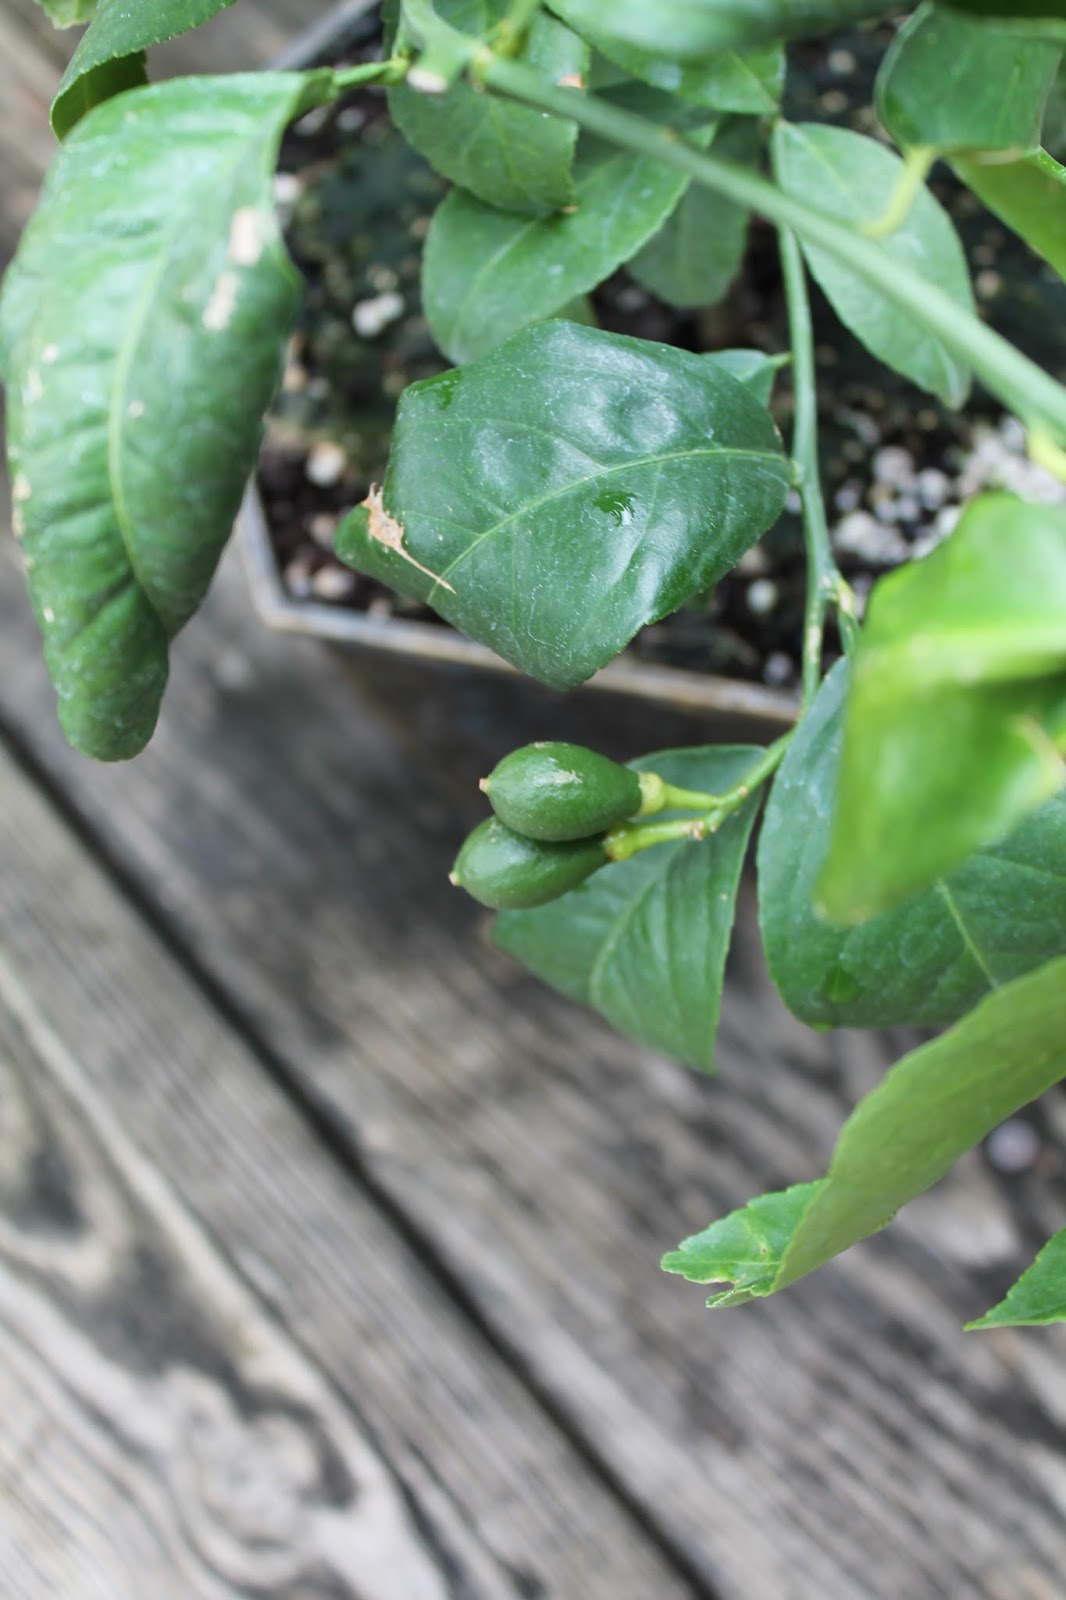
I've been wanting a citrus tree for years. Not only do the flowers smell amazing, but then you get citrus fruit from them! This year, we added a Meyer lemon tree, and we already have quite a few tiny fruits on it. I can't wait to see how this turns out.


Now on to the vegetables. One thing I really like about the gardening process is that it's an everchanging game. Every year, we make adjustments, crossing things off the list we don't really use or that don't have a good return on the space they take up. Last year, we learned that although we love watermelons and broccoli and cauliflower, they just take up far too much space in our little yard to make it worth our while. Some things stay on the list though, like tomatoes. Here's our tomato beds.


Here's our peppers and eggplants. And yes, we need to weed like WHOA! =)


We also have kale and lettuce, which is doing quite nicely. (You can see our cinderblock strawberry plants around the border)


Then we also have a cucumber and squash raised bed. This year, we planted patty pan, yellow squash, 8 ball squash and 2 types of cukes.


Hello little squash baby!


And here the herb section. We have lovage, basil, chamomile, oregano, sage, rosemary, parsley, chives, stevia, and thyme.


You can see the lemon balm has exploded.


And every year, we like to try something different. Last year, we did dried beans and they turned out quite amazing and will be a repeat. This year, we decided to try peanuts! We have 2 going in our potato bags and so far, so good.


We still have to plant our beans later this month, and we have 2 flower beds that are planted but are pretty boring to look at right now so I'll share those when there are more blooms going on. Here's the only thing blooming so far - a gorgeous fuchsia plant.


Hope your gardens are doing well!

Thursday, May 28, 2015

Hearty Indian-spiced Chickpea Salad

We make this recipe pretty much on a weekly basis round here in the 28 Cooks kitchen and I just realized I've never shared it on my blog. So let's rectify that immediately.

Vegetarians and vegans are often left out of the sandwich game. Sure, cheese sandwiches and veggie sandwiches have their place, but you can only eat so many of them. Sometimes you want something hearty - something that sticks with you. You want to open your lunch bag at work, pull out a sandwich and have people say "Now that looks tasty! What is that??" Enter the chickpea salad.

Everyone and their mother on Pinterest has some version of this salad, but I'd like to think mine is up there with some of the tastiest ones. And it couldn't be easier.

Start with chickpeas. You can use canned chickpeas, although we keep some in the freezer at all times just for this recipe.


Never tried freezing chickpeas? It's simple - take 4 cups dried chickpeas (or any dried bean for that matter) and add to pressure cooker with 6 cups water. And no, I don't mess with any of that presoaking nonsense. Ain't nobody got time for that. Sometimes I'll get real fancy and throw in a bay leaf or two, but more often than not, it's just the beans and water. Cover, bring to pressure, and cook per your pressure cooker's instructions. (Mine take about 45 minutes) Release pressure, rinse in cool water, dry, and freeze in bags.

Anyway, take some chickpeas, and add chopped carrots, onions, and pickles. Add celery if you want. There really is no wrong answer here. I like my salad on the drier side so I add just enough mayo to pull it together. Add more if you want. Mix in the spices and boom! You've got chickpea salad.

This makes great sandwiches and packs really well for brown bag lunches. My very favorite bread is a Rosemary Raisin variation of my One Hour French Bread recipe. Or keep it gluten free and put on top of a salad or in a lettuce wrap.


Hearty Indian-spiced Chickpea Salad
3 cups (or 2 cans) rinsed and drained chickpeas
4 tbsp. mayo (more or less, depending on your preference. Use vegenaise to keep it vegan)
1/2 cup chopped carrots
1/2 cup chopped onion
1/4 cup chopped pickles
3/4 tsp curry powder
1/2 tsp cumin
1/2 tsp ground coriander
1/4 tsp celery seed
1/8 tsp cayenne pepper
1/2 tsp salt
Freshly cracked pepper to taste

Place chickpeas in a bowl and mash with a potato masher. I like a little texture in mine, but feel free to smash them as much as you want. Add remaining ingredients and stir to combine. Allow salad to chill in the fridge for an hour or two for flavors to get all friendly like. Enjoy!