Monday, November 29, 2010

Sweet and Spicy Sweet Potato Chips

This post kicks off my "Homemade Holiday Gifting" Week here on 28 Cooks. I've come to realize that I don't just want to buy some sort of shiny trinket for friends and family for Christmas. Sure, I could spend hundreds of dollars and buy all sorts of things, but I really want to give something personalized and delicious. So all this week, I'll be posting gift ideas that are tasty and delicious and sure to be enjoyed.

So those that know me well know that I can sometimes be an impulse buyer. I'll see something and know that I just HAVE to have it. As I've gotten older and wiser, I've learned to curb it a bit. I'll be honest when I say that when I got my dehydrator, a small quiet part of me said, "You'll use this for a few weeks and then it'll collect dust." But honestly, I use this all the time. I've had it about 2 years, and I'd say I use it at least 5-6 times each month. Matter of fact, I use it so much, that it takes up extremely valuable counter space in my kitchen and has for the past several months.

One of my favorite things to make in it is crunchy and salty snacks. I'm a huge salty snack person, so having a dehydrator means I can make healthy snacks that don't come with all the guilt.

These sweet potato chips are on constant rotation in my kitchen. They are spicy and sweet and salty, and their crispity-crunchiness just can't be beat. I think a bag of these will be a perfect addition to any foodie gift basket.

And don't forget to check back tomorrow for another great homemade gift idea.
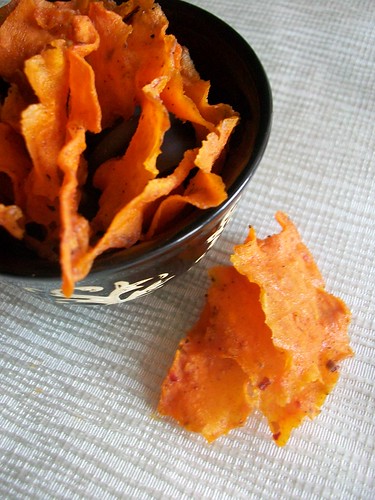
Sweet and Spicy Sweet Potato Chips

Sweet and Spicy Sweet Potato Chips

2 sweet potatoes
Olive oil
1/4 tsp cumin
1/4 tsp garlic powder
1/4 tsp chili powder
1/4 tsp crushed red pepper
salt and pepper to taste
2 tsp raw sugar

Peel sweet potatoes. Slice thinly, using either a mandoline or vegetable peeler. Place in small bowl and drizzle a small amount of olive oil over, tossing well to coat. Add seasonings and mix well. Place onto dehydrator shelves and dehydrate at 105 degrees for 24 hours, until crispy and dry.
Monday, November 15, 2010

Creamy Cauliflower Soup with Shredded Brussel Sprouts

So let's be honest with each other, shall we? Listen - I love food. I do. I love gourmet restaurants and I love making labor-intensive recipes. For the most part. But in the real world, I work a pretty stressful job that gets me home later in the evening. Quite frankly, the last thing I want to do is spend hours in the kitchen making dinner. But at the same time, I want good flavors and I want the recipe to taste like I slaved over it for hours.

Before I left for work this morning, I noticed a head of cauliflower and some brussel sprouts I wanted to use up. I'm a huge fan of roasting them both, but I knew I wanted something different.

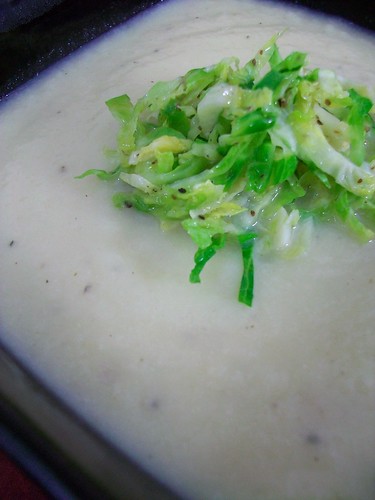
Let's talk about the soup first. Sweet cauliflower, it's delicious. It literally took about 25 minutes from opening the refrigerator to sitting down at my dinner table to eat. But the flavor? Tastes like I spent an hour on it. And the best part about it? It's practically fat-free and vegan!

The soup is wonderful on its own, but I decided to top it with some of the brussel sprouts I made. And trust me, these sprouts are no slouch! They could easily stand on their own as a side dish and I'm pretty sure they could convert even non-brussel sprout lovers. And again, these are quick and easy and cook up in just a few minutes.

So go ahead and give this wonderful combo a try! I promise you will not be disappointed!

Creamy Cauliflower Soup with Shredded Brussel Sprouts

Creamy Cauliflower Soup

1 cup diced onion
4 cloves garlic, minced
3 tbsp olive oil
5 cups chopped cauliflower
2 cups vegetable broth
Salt and pepper to taste
1 tbsp tarragon vinegar

In a medium saucepan, heat olive oil over medium high heat. Add onion and saute for 2 minutes. Add garlic and cauliflower to pan and stir well. Sprinkle with a little salt. Saute for 7-10 minutes, stirring occasionally. (it may seem dry in the pan, but you want it to get a little crispy) Add broth and bring to a boil. Lower heat to medium, cover, and boil for 10 minutes, until cauliflower is fork tender. Remove from heat. Using an immersion blender, process soup until creamy and no pieces of
cauliflower remain. Stir in tarragon vinegar and adjust seasoning.

Shredded Brussel Sprouts

2 tbsp olive oil
2 tbsp Smart Balance or butter
2 cloves garlic
1 pound brussel sprouts, cleaned and thinly sliced with knife
salt and pepper
1/4 tsp celery seed

In a small pan, heat olive oil and butter. Add garlic and saute for 30 seconds. Add brussel sprouts, salt, pepper, and celery seed. Stir well. Cook for 3-5 minutes, until brussel sprouts are tender but still retain some bite to them.

Monday, November 08, 2010

Tabbouleh, raw style

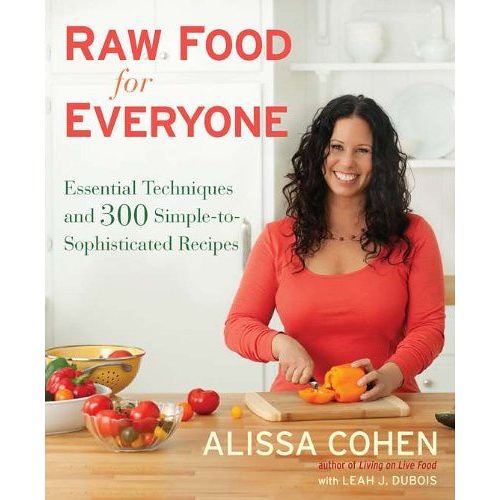
Before I get into this new recipe, allow me to announce the winner of Alissa Cohen's latest cookbook, "Raw Food for Everyone." Congratulations, dbswissy! Here is her randomly-picked winning comment:

"...looking for ways to incorporate more raw fruits and veggies in my family's diet. Also I want to support my mom who is very into the raw food diet. I would love to be able to surprise her with some great recipes!"

Now speaking of raw food recipes, I can completely understand someone's hesitation to venture into a "raw food diet." Most cookbooks have long lists of special ingredients and appliances, and some recipes take 4-5 days of preparation. That's pretty intimidating!

One of my favorite raw food blogs is "Raw on $10 a Day." I love it because not only does she post days' worth of menus that cost less than $10 per day to make (usually for 2-3 people), but most of her recipes are simple, easy, and don't require a kitchen stocked with fancy appliances.

She has a cookbook out that I really like and this is variation on her recipe for Tabbouleh. I've always been a fan of tabbouleh, so I was excited to find a version done raw style.

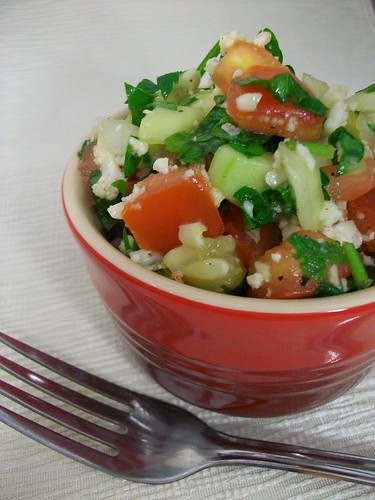
Sure, the weather is getting colder out there, but sometimes on a cold, windy day, you just want a fresh tasting dish with some snap to it. This recipe fits the bit - it's easy, it's full of fresh veggies and herbs, and will most definitely leave you feeling satisfied.

Tabbouleh

Tabbouleh, raw style

A variation from "Raw on $10 a Day"

1 c cauliflower florets
1 cup minced flat parsley
2 medium sized cucumbers, diced
2 tomatoes, seeded and diced
1/2 large onion, diced
1/4 cup minced fresh mint leaves
1/3 cup fresh lemon juice
1/4 tsp garam masala
1 tsp balsamic vinegar
Drizzle of olive oil
Salt and pepper

Place cauliflower florets in food processor. Pulse until it becomes small rice-sized pieces. Add to a large mixing bowl and combine with remaining ingredients. Season to taste with salt and pepper. Serve and enjoy!

Thursday, November 04, 2010

Win a copy of "Raw Food for Everyone!"

I was so excited when I was contacted and asked if I wanted to give away a copy of Alissa Cohen's newest book, "Raw Food For Everyone." I've been a huge fan of Cohen's, ever since I laid my hands on her first book, "Living Food."

book


What a great second book this is. What I love about it is that it's a very tangible and usable book for almost any home cook. The problem I have with most raw food books is that they use all sorts of fancy ingredients and equipment that most kitchens aren't stocked with, unless you just happen to be a raw vegan. As someone who dabbles with eating raw as much as I can, I'm not always in the mood to make a recipe that requires special ingredients that require a trip to my local health food store and 48 hours of prep and cook time.

Now don't get me wrong - like her first book, this definitely has some recipes that will require some time. But it's a great mix of easy, quick recipes and more gourmet, intensive recipes.

The book starts with chapters on soaking, sprouting, why raw foods are good for you, etc. Then it moves into the recipes. There are some great cheese recipes, pickles, smoothies, crackers and wraps - you name it, it's probably in here. Whether you're a raw foodist, a vegan, or just interested in raw food, this is definitely a great book to have in your library!

Alright, now that I've gone on long enough, let's get to the good part.

WANT THE CHANCE TO WIN?

It's easy to participate. All you have to do is answer the following question in this post's comment section. The contest will end Sunday night, November 7th @ midnite. I'll enter everyone's name who answered the question into a drawing and announce the winner on my blog Saturday, November 6th.

QUESTION: What is your primary diet - vegan, vegetarian, raw foodist, none of the above but just curious, etc.?

For another entry - follow 28Cooks on Twitter. Make sure to leave me a comment if you do.

For an additional entry - Post this message on Facebook – you can do this once each day for an extra entry: I entered to win a a copy of "Raw Food for Everyone" at www.28cooks.com & you can too – http://bit.ly/c5efom

For an additional entry - Tweet this contest on Twitter, you can do this once each day for an extra entry - copy this for your Tweet: RT – I entered to win a copy of Alissa Cohen's "Raw Food for Everyone" & you can too @28Cooks – http://bit.ly/c5efom

Want another chance to win? Write about this giveaway on your blog and link back to this blog post. Come back to let me know in a separate comment.

Monday, October 11, 2010

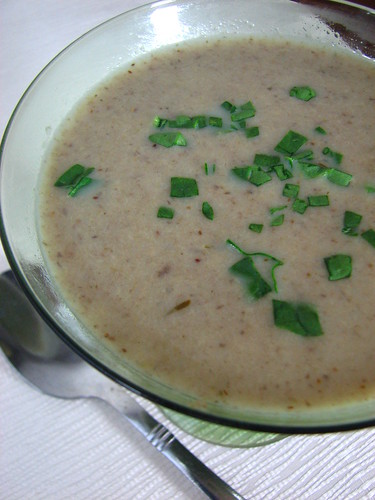
Idiot's Delicious Mushroom Soup

The Internet is a wonderful thing. But it's kinda like a GPS - you sort of become dependent on it and then forget that you actually DO know how to get there.

I just got home from a weekend away (which was glorious, by the way) but came home to a refrigerator full of rapidly expiring veggies. I saw some mushrooms that were just starting to turn to the dark side and thought that a mushroom soup would be fantastic. I really didn't want a heavy cream-based soup, but yet I wanted something with some serious flavor punch.

So what did I do? I started Googling. And then googled some more. And then more. And after looking at the 17th recipe, it hit me - I'm not an idiot! I can easily just make my own recipe. So that's what I did. And so this soup was born.

It's easy, it's delicious, it's warming and filling, and it's flavorful. Is there anything else you want from a soup?? Oh, you wanted quick too? Good, because this recipe takes about 20 minutes, from idea to mouth. So go ahead and give this a try!

Idiot's Delicious Mushroom Soup

Idiot's Delicious Mushroom Soup

Serves 6-8

4 tbsp butter or margarine
2 tbsp olive oil
2 stalks celery, diced
1 medium white onion, diced
4 cloves garlic, minced
1 (8 oz) pkg sliced baby bella mushrooms
1/2 tsp dried thyme leaves
1/2 tsp celery seed
1/2 tsp poultry seasoning
4 cups vegetable or chicken broth

In a medium saucepan over medium heat, melt butter. Add olive oil and allow to warm. Add celery, onion, and garlic, and saute for 4-5 minutes, until vegetables start to soften. Add mushrooms, thyme, celery seed, and poultry seasoning. Saute another 3-4 minutes. Add broth and bring to a boil. Lower heat and simmer, uncovered, for another 10-12 minutes. Remove from heat and puree with an immersion blender. Serve, and enjoy!

Wednesday, August 18, 2010

No-Knead Bread

Okay, so I'm smack in the middle of "Pantry Week" and I've vowed to not purchase any new groceries until it's over. That was all well and good, until I remembered I wanted some bread for the leftover meatloaf to make sandwiches. So what was I to do? Make some.

I have never made bread outside of a bread machine. I've always thought about it, but have just never tried it. Even when I purchased the No-Knead cookbook. And even when i saw this recipe online. I just didn't try it. Until now.

And let me tell you - I'm kicking myself for not doing it up until now. Seriously, listen to me. If you have not tried this recipe, do it. Right now. Get up, go to the kitchen, and start this. Why? Because it's easy and the finished product is delicious.

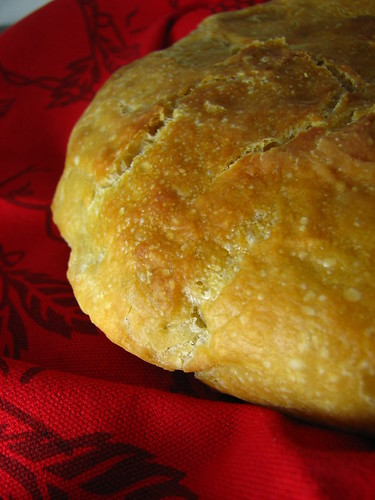
This gorgeous loaf of bread literally cost me about 10 minutes of actual labor. The rest was spent either minding it's own business overnight on the counter, or cooking. The recipe is foolproof.

Oh, and the bread. Absolutely delicious. It has a lovely thick chewy crust, and the inside is delicious. It's exactly what I want my bread to be. Seriously. I mean, just look at it!

No-Knead Bread

Anyway, here's the link to the recipe. I followed it exactly as written, using parchment paper. I plan on making some variations for the next batch. Enjoy! And if you try it, let me know!

Tuesday, August 17, 2010

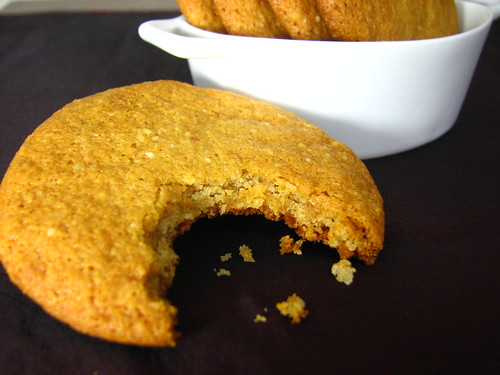
Coconut Almond Cookies

So as you can tell from the recipes listed on the sidebar, I'm not much for baking or sweets. Salty snacks tempt me far more than a piece of cake or pie. That being said, there are times that I do crave just a little something sweet to take the edge off.

I'm deeply embroiled in pantry week, so I've been pulling out all of my cookbooks and looking for some stellar recipes to use. I was looking for a cookie that was easy, but also one where I had all the ingredients already in my kitchen. I knew I wanted something vegan, but as I sadly realized I as out of Smart Balance, the list of potentials grew shorter and shorter.

I finally found a recipe in Veganomicon (which is a fantastic vegan cookbook, by the way) that sounded tasty. I quickly skimmed the ingredient list, thought, "yeah, I have all that," and proceeded to the kitchen to make it.

Well, as I started throwing it all together, I realized I was out of a few crucial elements. The first was canola oil, or any oil actually. As I realized my olive oil supply was on the slim side, I knew I didn't want to use that all up. I almost bagged the entire recipe, but then remembered the 2 jars of coconut oil I stashed away. I crossed my fingers and began making the recipe.

Whoa. These cookies are amazing! Not only are they light and crispy, they aren't overly sweet and have a lovely almond and coconut flavor. And seeing how they took me only a few minutes to throw together before they went into the oven, I can guarantee you these shall make an appearance many many times in the future.

Check back tomorrow for my first attempt at breadmaking and the reason why everyone should try this recipe.

Coconut Almond Cookies

Coconut Almond Cookies
Makes 38-40 cookies

2 1/4 cups all-purpose flour
1/2 c natural almonds, ground into flour
1 1/4 tsp baking soda
1/2 tsp salt
1/2 c coconut oil, warmed slightly
1/4 c agave nectar
1/4 c coconut milk or almond milk
2/3 c sugar
1 1/2 tsp almond extract
1/2 tsp vanilla extract

Preheat oven to 350. Put a layer of parchment paper onto 2 baking sheets and set aside. In a medium bowl, sift together flour, almond flour, baking soda, and salt. Set aside. In a large bowl, beat together coconut oil, agave nectar, milk, sugar, and extracts until well combined. Add in flours and beat until a thick batter is formed. Allow to rest in the refrigerator for a few minutes. Drop by the tablespoon onto baking sheets. Place in oven and bake for 7-9 minutes, until cookie is golden brown. With a flat spatula, remove from baking sheet and place on wire racks to cool.