Sunday, December 31, 2006

Happy New Year

This has been a great year here at 28 Cooks. I started this blog back on January 4th of 2005, and I had no idea I would enjoy it as much as I do. For those who have been with me from the very beginning when my pictures looked like this, and those who have joined me over the past year, I thank you for the comments, the emails, the support, and the willingness to keep coming back as I still continue to learn.

I hope this year has been as wonderful for you as it's been for me, and I hope that the next year is even better for us all.

Lancaster Walk

From the 28 Cooks Kitchen, I wish you a very Happy New Year!

Friday, December 29, 2006

Cardamom Coconut Macaroons & Coquito

Although the big holiday event has come and gone already, there is still one more in the near future. New Year's Eve is another reason to get together with your friends, sharing memories and good food. Unlike the night before Thanksgiving, which is the biggest day to go out and party, New Year's Eve is the biggest day to party at someone's house. And although I don't have plans as of yet, I'm sure New Year's Eve will find me surrounded by good friends and fun.

Cardamom Coconut Macaroons


If you're looking for a quick and easy dessert idea for another upcoming event, this is a winner. The macaroons are amazingly quick to make (my batch took about 20 minutes, from start to cooling time) and the cardamom adds a lovely exotic flavor. This recipe is courtesy of one of my new favorite cookbooks, In Nirmala's Kitchen.

Coquito


The coquito is a recipe courtesy of a coworker of mine. Coquito is a traditional Puerto Rican holiday beverage and is a tasty variation of eggnog. Although I'm not wild about the traditional eggnog, this one is definitely delicious and bang-dead easy to make.


Cardamom Coconut Macaroons
Makes about 16 large cookies
2 1/2 c unsweetened grated coconut
1/4 c sweetened condensed milk
2 tsp ground cardamom
2 large pinches salt
2 large egg whites

In a large bowl, combine coconut, milk, cardamom, and one pinch of salt. Stir well with a wooden spoon until evenly combined. Set aside. In a small bowl, combine egg whites and pinch of salt; beat with mixer until stiff peaks form. Fold into coconut mixture until just combined.
Drop 1 tbsp of batter onto parchment-lined baking sheet, leaving about 1 inch between cookies. With wet hands, mold into mounds. Bake in oven for 8-10 minutes, until edges are starting to brown. Cool on sheet for 5 minutes, then remove and cool on wire racks. If desired, cookies are wonderful drizzled with melted dark chocolate.

Coquito
1 (15 oz) can cream of coconut
1 (15 oz) can coconut milk
1 (15 oz) can sweetened condensed milk
1 (15 oz) can coconut water
1 tbsp vanilla
1 tsp cinnamon
1/4 tsp nutmeg
2 egg yolks (optional)
8 oz rum, either white or coconut (optional)

Empty all 4 cans into blender. Process until well mixed. Add vanilla, cinnamon, nutmeg, and egg yolks, if using. Blend well. Add rum, stir well, and allow to sit in the refrigerator overnight. If mixture is too thick, add milk or more coconut milk to thin.

Thursday, December 28, 2006

Chili Garlic Edamame

I've had edamame a few times in the past, but I didn't fall in love with it until I had it at Nectar (which is an exceptional restaurant, and is amazingly close to the restaurant I've always dreamed of opening). They do a simple quick stir in a wok and serve it with some delicious sauces. After tasting it there, I immediately came home and tried to recreate it. I've gotten pretty close, and I often like to whip it up* for a quick and fairly healthy snack.

But this morning, as I was flipping through this month's current issue of Gourmet, I saw a recipe for edamame that I just knew I needed to try. The following is my variation, and includes one of my new favorite things, chili garlic sauce. This is a relatively simple recipe to whip up, and would make a fabulous appetizer.


As an aside, please bear with me as I learn the techniques and settings on the new camera.
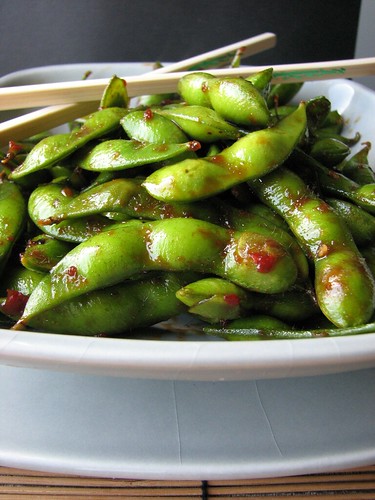

Chili Garlic Edamame

Chili Garlic Edamame
1 lb frozen edamame, in pods
2 tbsp soy sauce
2 tsp oyster sauce
1 tsp sesame oil
1 1/2 tsp chili garlic sauce
2 tsp vegetable oil
1 tsp minced ginger

Steam edamame in microwave until slightly warm and not frozen. (You can do this one of 2 ways - I have a microwave steamer that I use, or even easier is throwing the edamame in a ziploc bag with about a tbsp of water, sealing it, leaving a small opening for steam, and heating it on high for 2 minutes) Drain and set aside. In a small bowl, combine soy sauce, oyster sauce, sesame oil, and chili garlic sauce. Heat a large wok over high heat. Add oil, and saute ginger for 15 seconds. Add edamame and stirfry for 1 minute. Add sauce, and stirring frequently, cook for an additional 1-2 inutes, or until most of the liquid has evaporated. Remove from heat, place in serving dish, and enjoy!

*This is the easiest way to make tasty edamame - steam in microwave as above. Heat 1 tsp of sesame oil in wok over high heat. Add edamame, season with Adobo or any other salt seasoning blend, and stirfry for 1-2 minutes, until heated through.

Wednesday, December 27, 2006

Blessed Christmas

This has been a good year for 28 Cooks, and this past Christmas was no exception. Not only did Santa bring some lovely gifts, including a dream camera, a gorgeous French press, and some lovely Le Creuset cookware, but I got to do one of the things I enjoy the most - spend time with my family. The days were spent eating, monkeying around, and laughing far too much.

And to all of you who donated money towards the Menu of Hope, a sincere thanks! A total of $58,256.70 was raised for the UN World Food Programme. How amazing!

I'll be back tomorrow with some new recipes and hopefully some upgraded photography with my new baby.

Wednesday, December 20, 2006

Menu for Hope III

menuforhopelogo


I don't think there's a food blogger out there who doesn't have a deep and personal relationship with food. It's the very essence of what we do, and we love it enough to devote our time to learning more about it. But we're the lucky ones - we can go to the grocery store and load up our carts with whatever we want.

Every year, Food Bloggers from all over the world get together for a fundraising campaign. We call it 'Menu for Hope'. Last year, they raised $17,000 to help UNICEF.This year, Menu for Hope III is raising funds to support the UN World Food Programme, which provides hunger relief for needy people worldwide. So far this year, they've raised over $34,000.

This "Menu for Hope" is our small way to help.On the menu this year is a great list of amazing food related prizes. We hope that they will entice you to give whatever you can, and with some luck you can win unique and wonderful food gifts offered up by food bloggers from around the world.The rule is pretty easy. For every US$10 you donate, you may claim one raffle ticket toward a prize of your choice. The more you give, the better your chance to win. The campaign is scheduled to run from now until Friday 22nd, 6PM PST. So get a move on!

There are some seriously excellent prizes this year - vouchers for $350-$400 at some excellent restaurants, bottles of wine, and all sorts of cookbooks, tools, and food from all over the world. It's definitely worth checking it out, and definitely worth spending a few dollars towards a good cause.

Wednesday, December 13, 2006

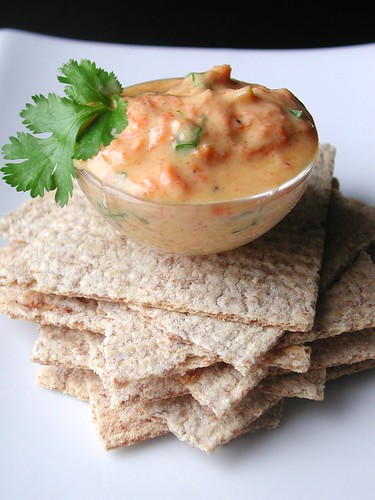
Carrot & Cilantro Raita

The other night, I was watching one of those cooking shows and the topic was Indian food. There's not much I love more than Indian food, so my interest was definitely piqued. One of the dishes made included a raita on the side, and I knew I wanted to give it a try. Raita is a typical South Asian sauce that is excellent with spicy foods. The cooling effect of the yogurt is the perfect complement to the spicy factor of most Indian foods.

This is a great little quick-and-easy dip. I made this in about 10 minutes, and it's got a lovely complex flavor, despite the recipe's easy and short ingredient list. Serve with samosas, curries, or spread on pita.

Carrot & Cilantro Raita

Carrot & Cilantro Raita
1/4 carrot, finely shredded
1 clove garlic, minced
1/2 tsp paprika
1/4 c water
1/2 c yogurt
1/2 tsp fresh lemon juice
1 tbsp cilantro, finely minced

Place carrot, garlic, paprika, and water in a small saucepan. Bring to a boil, and simmer until all water is evaporated. Cool slightly. Place in small bowl. Add remaining ingredients and stir well.

Monday, December 11, 2006

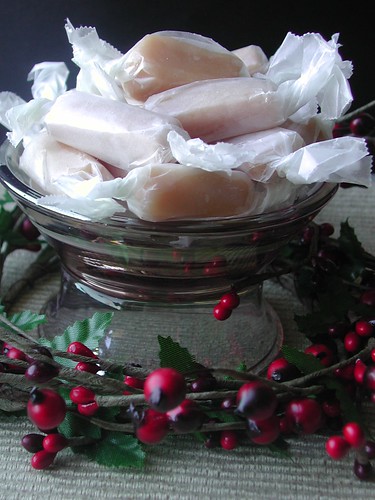
Fleur de Sel Caramels

As I was saying the other day, there are so many excellent food blogs that provide boundless inspiration for me. As I was doing my daily trip around my bloglines, I happened across this post at Everybody Likes Sandwiches. I became instantly obsessed with them, and knew they needed to be made immediately.

As luck would have it, I had just received a jar of Fleur De Sel as part of a gourmet salt sampler for my birthday, which was last week. I've been looking for recipes to use them in, so this was definitely a timely post.

I've never made caramels before, and I must admit it was much easier than I thought. The flavor is amazing, and the salt is the perfect complement to the creamy caramel. These are perfect for gift-giving, or for keeping around the house when you need to satiate a sweet tooth.

Fleur de Sel Caramels

Fleur de Sel Caramels
1 c heavy cream
5 tbsp unsalted butter, cut into pieces
1 1/4 tsp fleur de sel
1 1/2 c sugar
1/4 c light corn syrup
1/4 c water

Also needed - parchment paper, 8x8 pan, candy thermometer, glass of water with ice

Line bottom and sides of the 8x8 baking pan with parchment paper, then lightly oil parchment. (I used tape to secure the paper down). Bring cream, butter, and fleur de sel to a boil in a small saucepan, then remove from heat and set aside. Boil sugar, corn syrup, and water in a 4 qt saucepan, stirring until sugar is dissolved. Boil, without stirring but gently swirling pan, until mixture is a light golden caramel (This took about 5 minutes for me, and my thermometer read about 300 degrees). Carefully stir in cream mixture, which will bubble up rapidly, and simmer, stirring frequently, keeping temperature around 248 degrees. Continue to cook until a drop of caramel firms up to desired texture in the glass of ice water (I like a softer, chewier caramel, and this took about 5 minutes for me). Pour into baking pan and allow to cool for 2 hours. Cut into pieces, and wrap in wax paper.

Friday, December 08, 2006

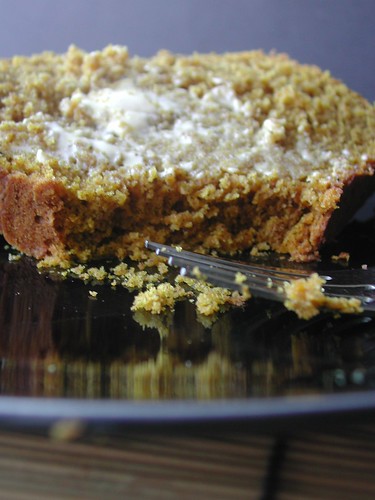
Chai Pumpkin Bread

There's nothing more comforting than richly-spiced bread, warm from the oven, and spread with melting butter. This is a perfect wintertime bread, and if you love chai tea, you'll love this.

Perfect for those afternoon cups of coffee or tea, or great to make in mini loaves and give as gifts.

Chai Spiced Pumpkin Bread

Chai Pumpkin Bread
1/2 c sugar
1/2 c butter, at room temperature
1 c canned pumpkin
2 large eggs
2 chai tea bags, steeped in 1/2 c boiling water
1 tsp vanilla
1 1/3 c all-purpose flour
2/3 c whole-wheet flour
2 tsp baking powder
1/2 tsp baking soda
1 1/2 tsp salt
2 tsp cinnamon
1/2 tsp each cardamom, ginger, and black pepper
1/4 tsp each cloves, nutmeg, and allspice

Preheat oven to 350. In a large bowl, use a mixer to beat together sugar and butter until light and fluffy. Add pumpkin, eggs, chai tea liquid, and vanilla and stir until well combined. Add flour, baking powder, baking soda, salt, and spices and stir just until evenly moistened. Pour into prepared 8" loaf pan. Bake 45-55 minutes, or until a toothpick inserted comes out clean. Cool at least 20 minutes before serving.

Thursday, December 07, 2006

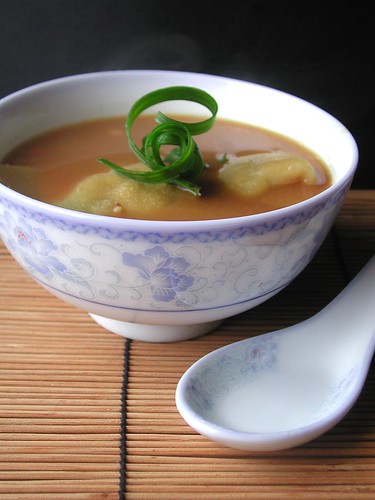
Soto Ayam with Baby Bella & Tofu Wontons

I love the food blogging community. Not only are there plenty of excellent food bloggers, but there are incredible readers who provide much inspiration. From time to time, someone will send me a recipe, asking me to give it a try or make it vegetarian. Since I always love a challenge, I truly enjoy these requests.

A few weeks ago, someone sent me a link to this recipe for Soto Ayam. Soto Ayam is a traditional Indonesian soup that usually includes chicken and peanuts. My original thought was to just use the broth, and include some fresh veggies. But as I was standing in the grocery store, I saw some lovely baby portabella mushrooms and knew in which direction I needed to head.

The tofu and mushrooms, touched with fresh lemon zest and ginger, are a winning combination, and when added to this exotically-flavored broth, make a perfect dish. This is a recipe that any fan of East Asian cuisine will enjoy and appreciate.

Soto Ayam with Baby Bella Tofu Wontons

Soto Ayam with Baby Bella & Tofu Wontons
Wontons
1 (14oz) pkg extra-firm tofu
2 cloves garlic
1 tbsp fresh ginger, minced
2 scallions, white parts only, diced
2 c diced baby portabella mushrooms
zest of 1 lemon
2 tsp soy sauce
1/2 tsp sesame oil
1 tsp chili garlic sauce (optional)
1 tsp cornstarch
1/4 tsp salt
2 pkgs wonton skins

Soto Ayam
4 cups vegetable stock
2 tsp soy sauce
1 1/2 tbsp light molasses
2 tbsp fresh lemon juice
2 cloves garlic, minced
3 tbsp extra-crunchy peanut butter

Prepare wontons first. Remove tofu from package and drain. Wrap tofu in paper towels; place on a plate, cover with cutting board with canned goods on top. Let drain about 30 minutes. Place into food processor with ginger, garlic, and scallions. Process until well combined. Place into large bowl with remaining wonton ingredients. Fold into wontons, following directions on back of wonton skin package. Recipe makes 48 wontons. Reserve 12-18 for soup. The rest can be frozen by placing onto a baking sheet and placed into the freezer until frozen, then stored in plastic bags until needed.
In a large saucepan, add stock, soy sauce, molasses, lemon juice, and garlic. Bring to a boil, lower heat, and allow to simmer for 10 minutes. Whisk in peanut butter, bring to a boil, and boil for 3 minutes. Drop in wontons, and boil for 5-8 minutes, until tender. Serve and enjoy!

Wednesday, December 06, 2006

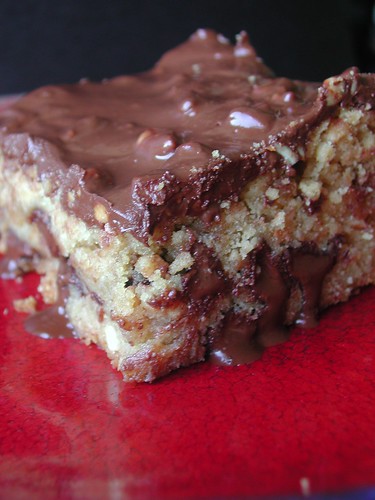
Dark Chocolate Peanut Butter Brownies

I've spent a substantial part of my life living and traveling in other countries. The most recent was a stint I did 2 years ago, teaching English in a small community in Guatemala. I loved living there and fell in love with the food, but there were always a few things I missed from the States.

No matter what country I was in, it seemed that one of the top 3 things that expatriots miss is good old peanut butter. Although there are substitutes, there's just nothing comparable to our brands like Jif and Skippy. Those two were always top requests to be brought by anyone coming to visit from the States.

One of the teachers in the school I was at was from Washington State, and had a nice little stash of Jif Peanut Butter. She would use it, as well as some excellent local dark chocolate, to make these brownies for any special occasion. Although they are by no means low-fat or diet-conscious, they are completely delicious and take me right back to a country I hold very dear in my heart.

Dk Chocolate Peanut Butter Brownies

Dark Chocolate Peanut Butter Brownies
1/2 c peanut butter
1/3 c butter
1 c sugar
1/4 c brown sugar
2 eggs (or egg substitute)
1 c flour
1 tsp baking powder
1/4 tsp salt
1 c dark (or milk) chocolate chips
1/2 tsp vanilla
Topping
1/2 c chocolate chips
1/3 c peanut butter

Preheat oven to 350 degrees. Beat peanut butter and butter until well combined. Gradually add sugars, and beat until fluffy. Add eggs, or egg substitute, gradually. Mix in flour, baking powder, and salt. By hand, stir in vanilla and chocolate chips. Spread into a buttered 8x8 pan, and place into oven. Bake 30 minutes, or until toothpick inserted in the center comes out clean. Remove from oven and cool completely on a wire cooling rack.
For topping, combine peanut butter and chocolate chips in a small bowl, and melt in the microwave, stirring occasionally. Spread over cooled cake.

Monday, December 04, 2006

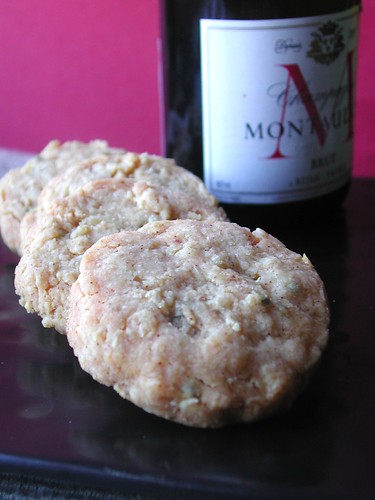
Green Peppercorn Asiago Biscuits

I think one of my favorite things about the holidays is all of the chances you have to entertain and be social. As I've said before, it's important to have recipes that you can make at a moment's notice for any surprise guests or events.

Although I'm a huge dip and spread fan, you also need things to put them on. I love to make my own crackers and flatbreads, and these are a delicious addition to my entertaining recipes.

Green peppercorns, especially those in brine, have such an incredible flavor, and I try to use them as often as possible. Combined with the asiago cheese, they add a lovely flavor to these light little biscuits that are perfect for serving with dips, or by themselves.

Green Peppercorn Asiago Biscuits II

Green Peppercorn Asiago Biscuits
1/2 lb butter, softened
2 tsp worcestershire sauce
a dash or two of hot sauce
2 c shredded Asiago cheese
1 1/2 c flour
1/2 tsp salt
1 tsp paprika
3/4 tsp green peppercorns, minced

Preheat oven to 375. In a small bowl, cream butter, worcestershire, hot sauce, and cheese until smooth. In a larger bowl, combine flour, salt, and paprika with a fork. Gradually add to cheese mixture. Add in peppercorns, and mix until dough holds together. (May need a tsp of water to help it hold together). Shape into a log, wrap in plastic wrap, and chill in the refrigerator for 10 minutes. Remove, slice, and place rounds on ungreased cookie sheet. Bake in oven for 10-15 minutes, or until lightly browned. Cool on a wire rack.

Friday, December 01, 2006

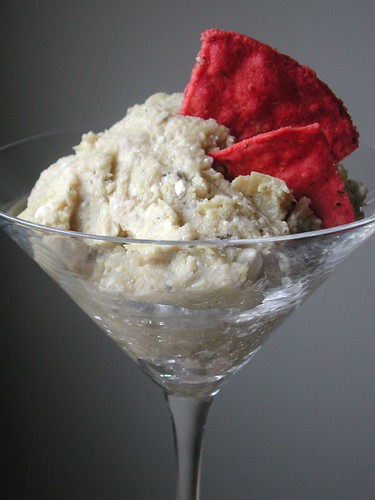
Cannellini Bean Hummus with Artichokes and Feta

So you know I've got a thing for hummus. And although I've made quite a few variations, I've never branched out into the cannellini-bean-hummus arena.

I've had a can of cannellini beans in my pantry for a bit, as well as a nice can of artichoke hearts, so I thought I'd try something with them. I must admit, I was rather surprised at how tasty the result was. Although cannellini beans and canned artichokes can be a bit dull, the lemon juice and feta cheese help to liven it up. This is another great recipe for entertaining that won't make you feel like you need to loosen your belt.

White Bean Artichoke Feta Spread

Cannellini Bean Hummus with Artichokes and Feta
1 (15 oz) can cannellini beans, drained and rinsed
1 (14 oz) can artichoke hearts, drained and rinsed
2 tbsp lemon juice
2 cloves garlic, minced
1/4 tsp salt
1/4 tsp pepper
1 tsp italian seasoning
4 oz feta cheese, crumbled

Combine beans, artichokes, lemon juice, garlic, salt, pepper, and italian seasoning in a food processor. Process until well combined. In medium bowl, place crumbled feta cheese. (I used a potato masher to crumble it a bit more and get rid of the larger chunks) Add pureed mixture, and stir until well combined. Allow to chill in the refrigerator for a few hours until flavors develop. Serve with crackers, tortilla chips, or fresh veggies.